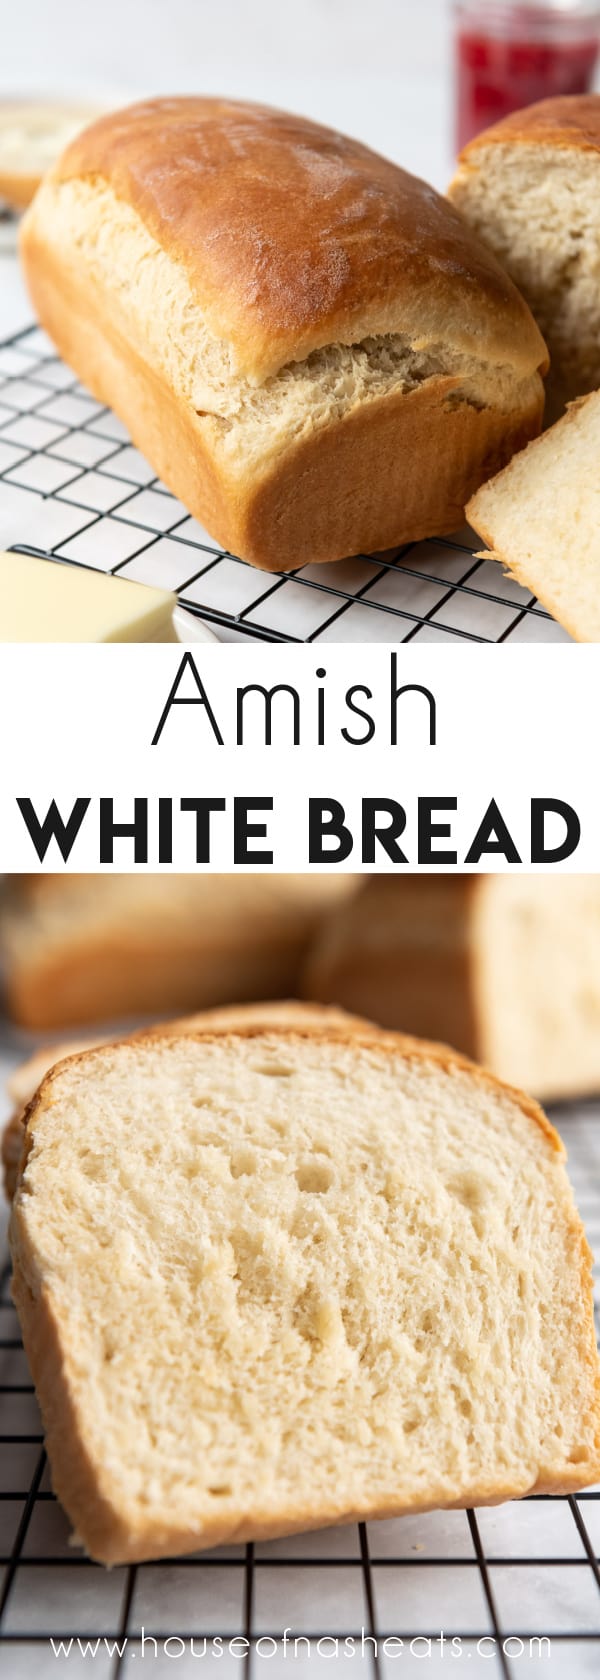
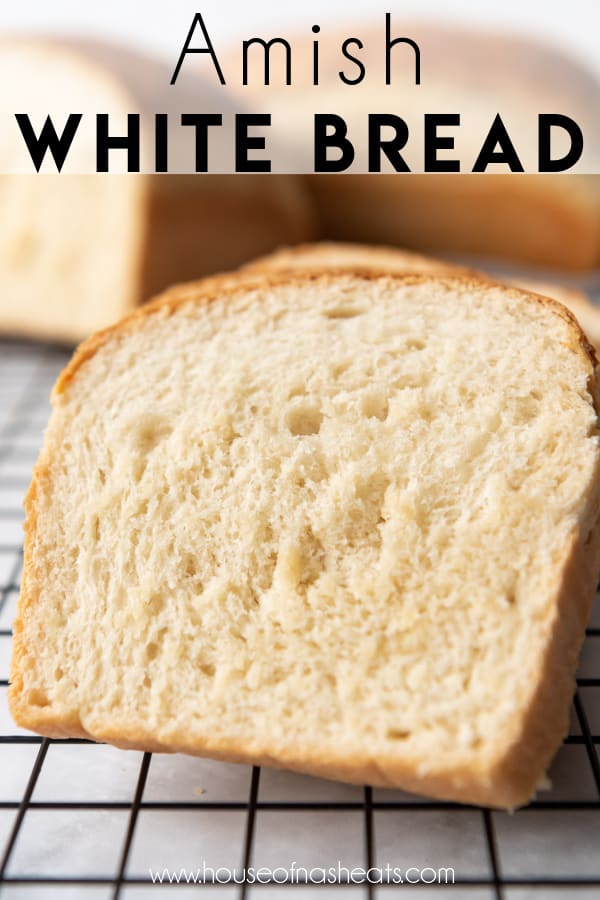
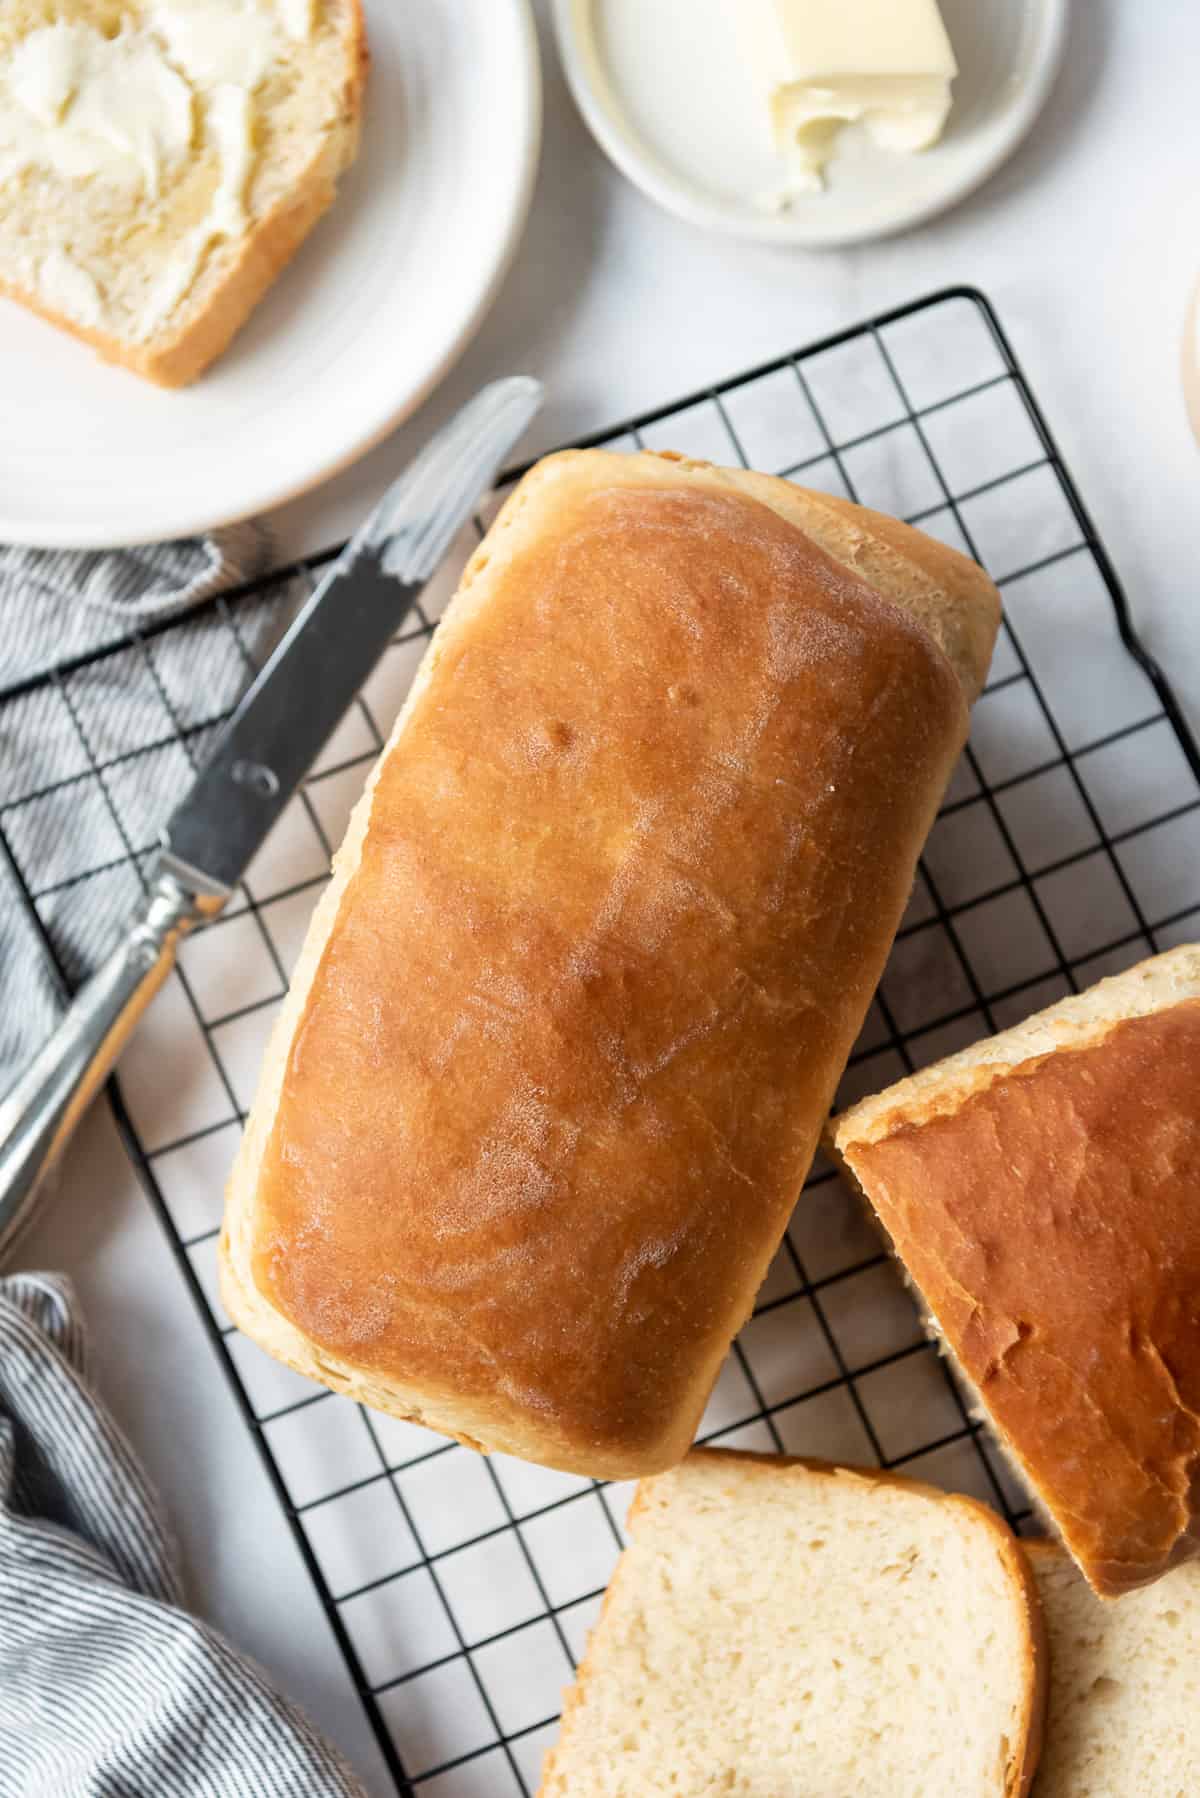
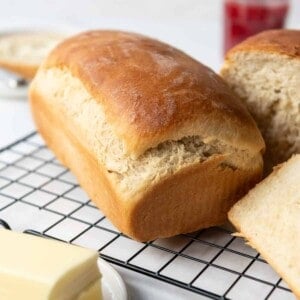
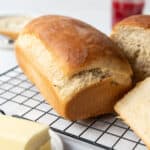
This easy Amish White Bread recipe makes a slightly sweet, soft & tender loaf that so much much better and fresher than picking up a loaf of bread at the store. It’s the perfect homemade bread for sandwiches, toast, or just eaten piping hot from the oven slathered with butter and honey or jam!
Amish Bread is so simple to make
When it comes to simple, classic soft and tender bread, this is Amish white bread is my favorite, go-to recipe.
I have been using this easy homemade sandwich bread recipe for years with only slight modifications to the original version that was probably shared with me by a college roommate or someone. I wish I could remember who!
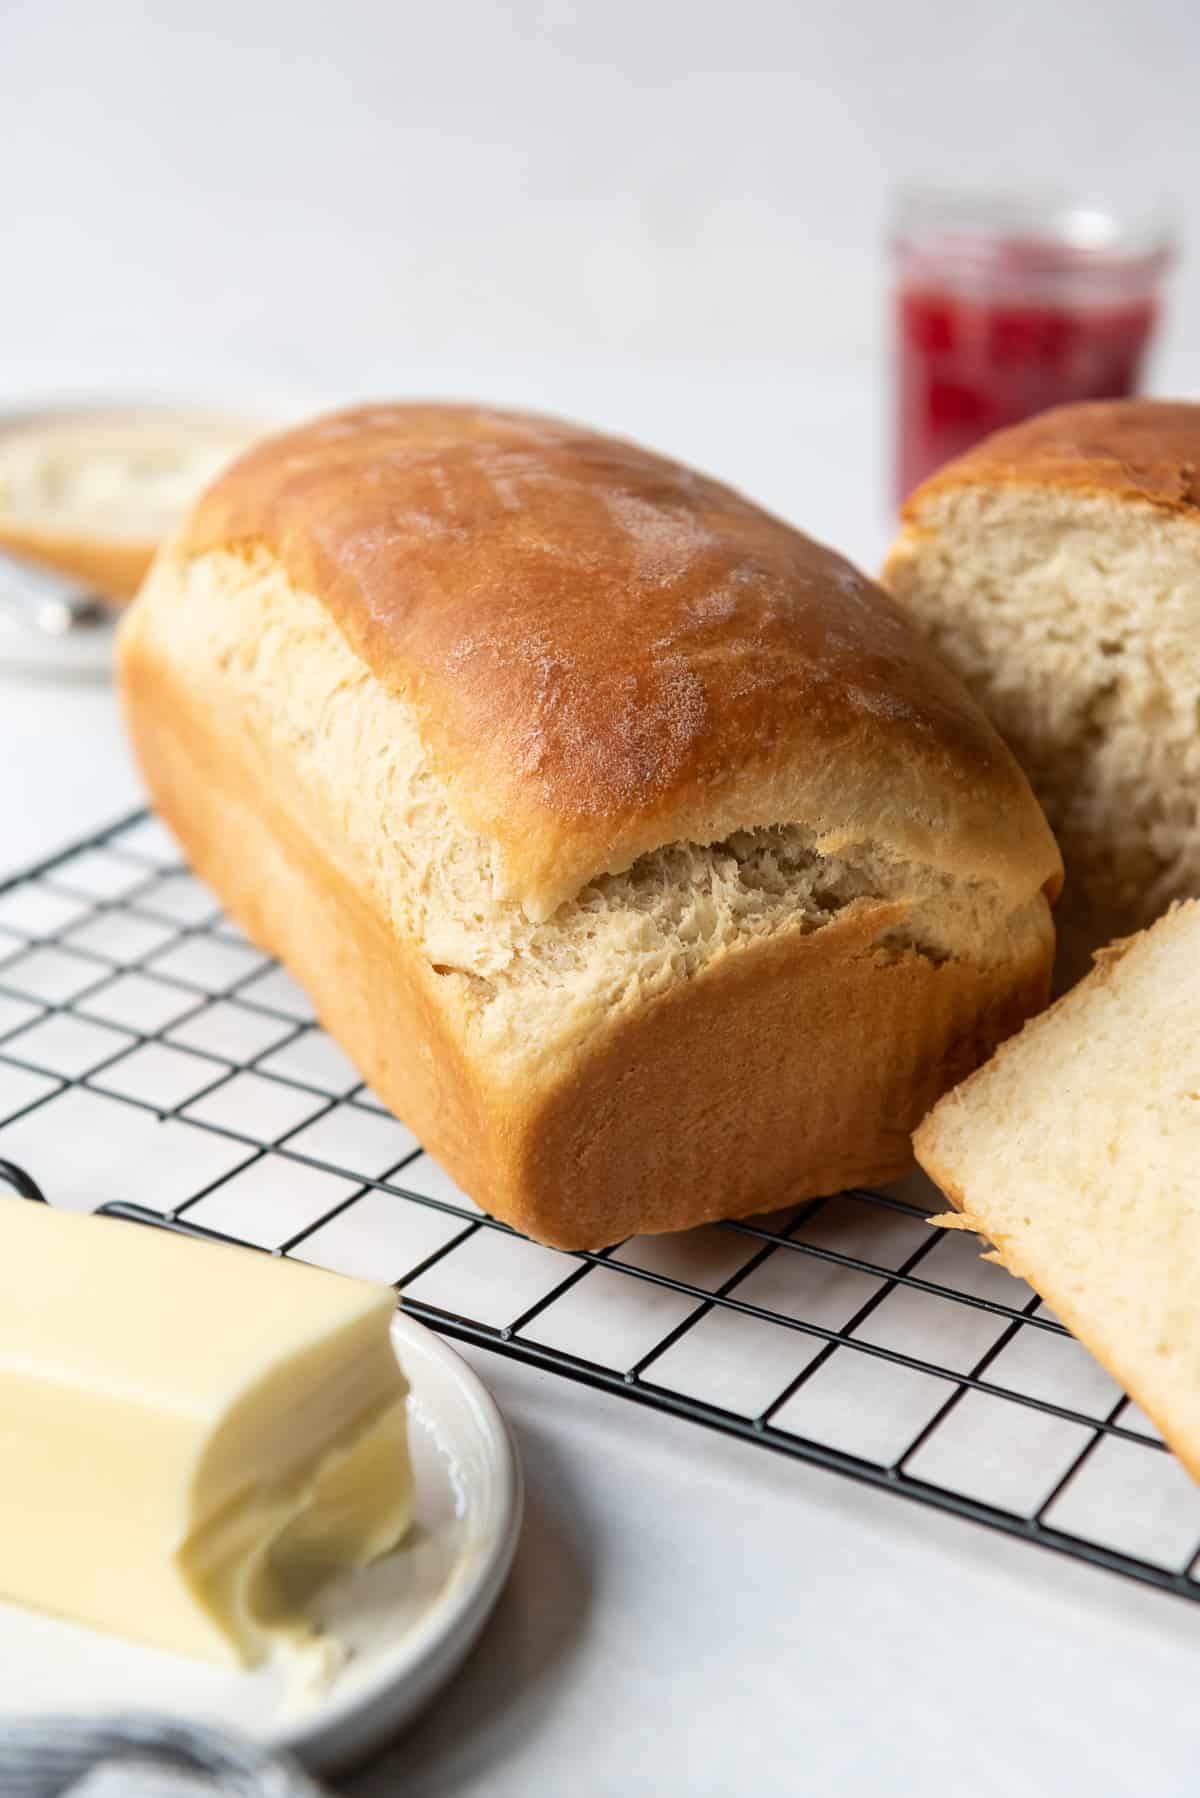
But this is the recipe that really taught me how to make bread. It’s so simple and forgiving and easy to work with and you will get two perfectly beautiful, rounded loaves that have a golden brown crust and a soft, white interior. It’s perfect for grilled cheese, PB&J, ham & cheese, you name it. You are absolutely going to love it.
Why this White Bread Recipe works
- As far as yeast breads go, this Amish white bread recipe is straight forward and fairly quickto make. Sure there is rising, but the actual active work time where you mixing and kneading the bread and then shaping it into loaves is more like 15 minutes. It’s great for beginners.
- You get two perfect loaves. Which can mean one for sharing with a neighbor, or one to devour immediately while it’s hot and the next to enjoy for sandwiches and toast the next day.
- What is better on a cold day than a bowl of soup and a slice of homemade bread? Nothing, that’s what. Okay, maybe chocolate chip cookies , but nothing else.
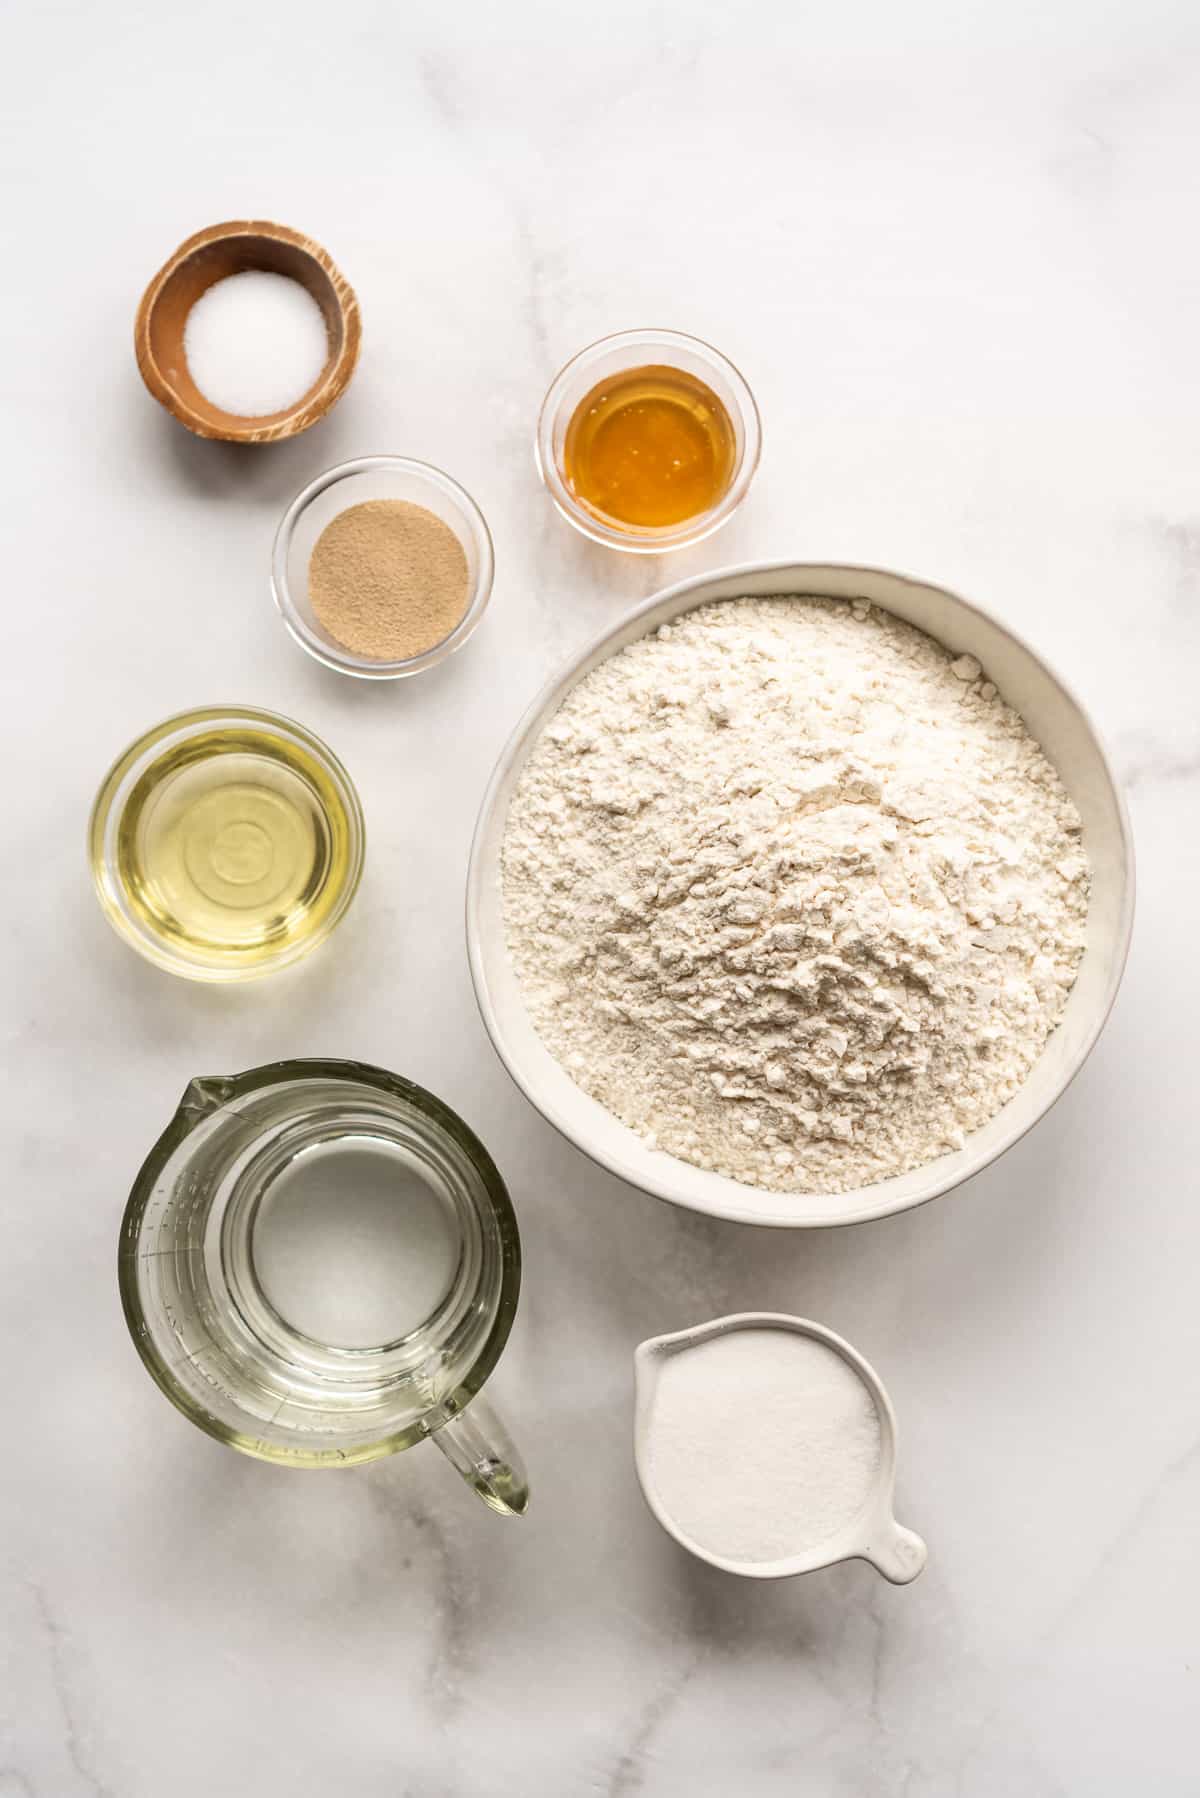
Amish White Bread ingredients
- Honey: One of the changes I made to the original version of this recipe was to decrease the sugar and replace some of it with two tablespoons of honey. It gives the bread a subtle sweetness and just a hint of honey flavor.
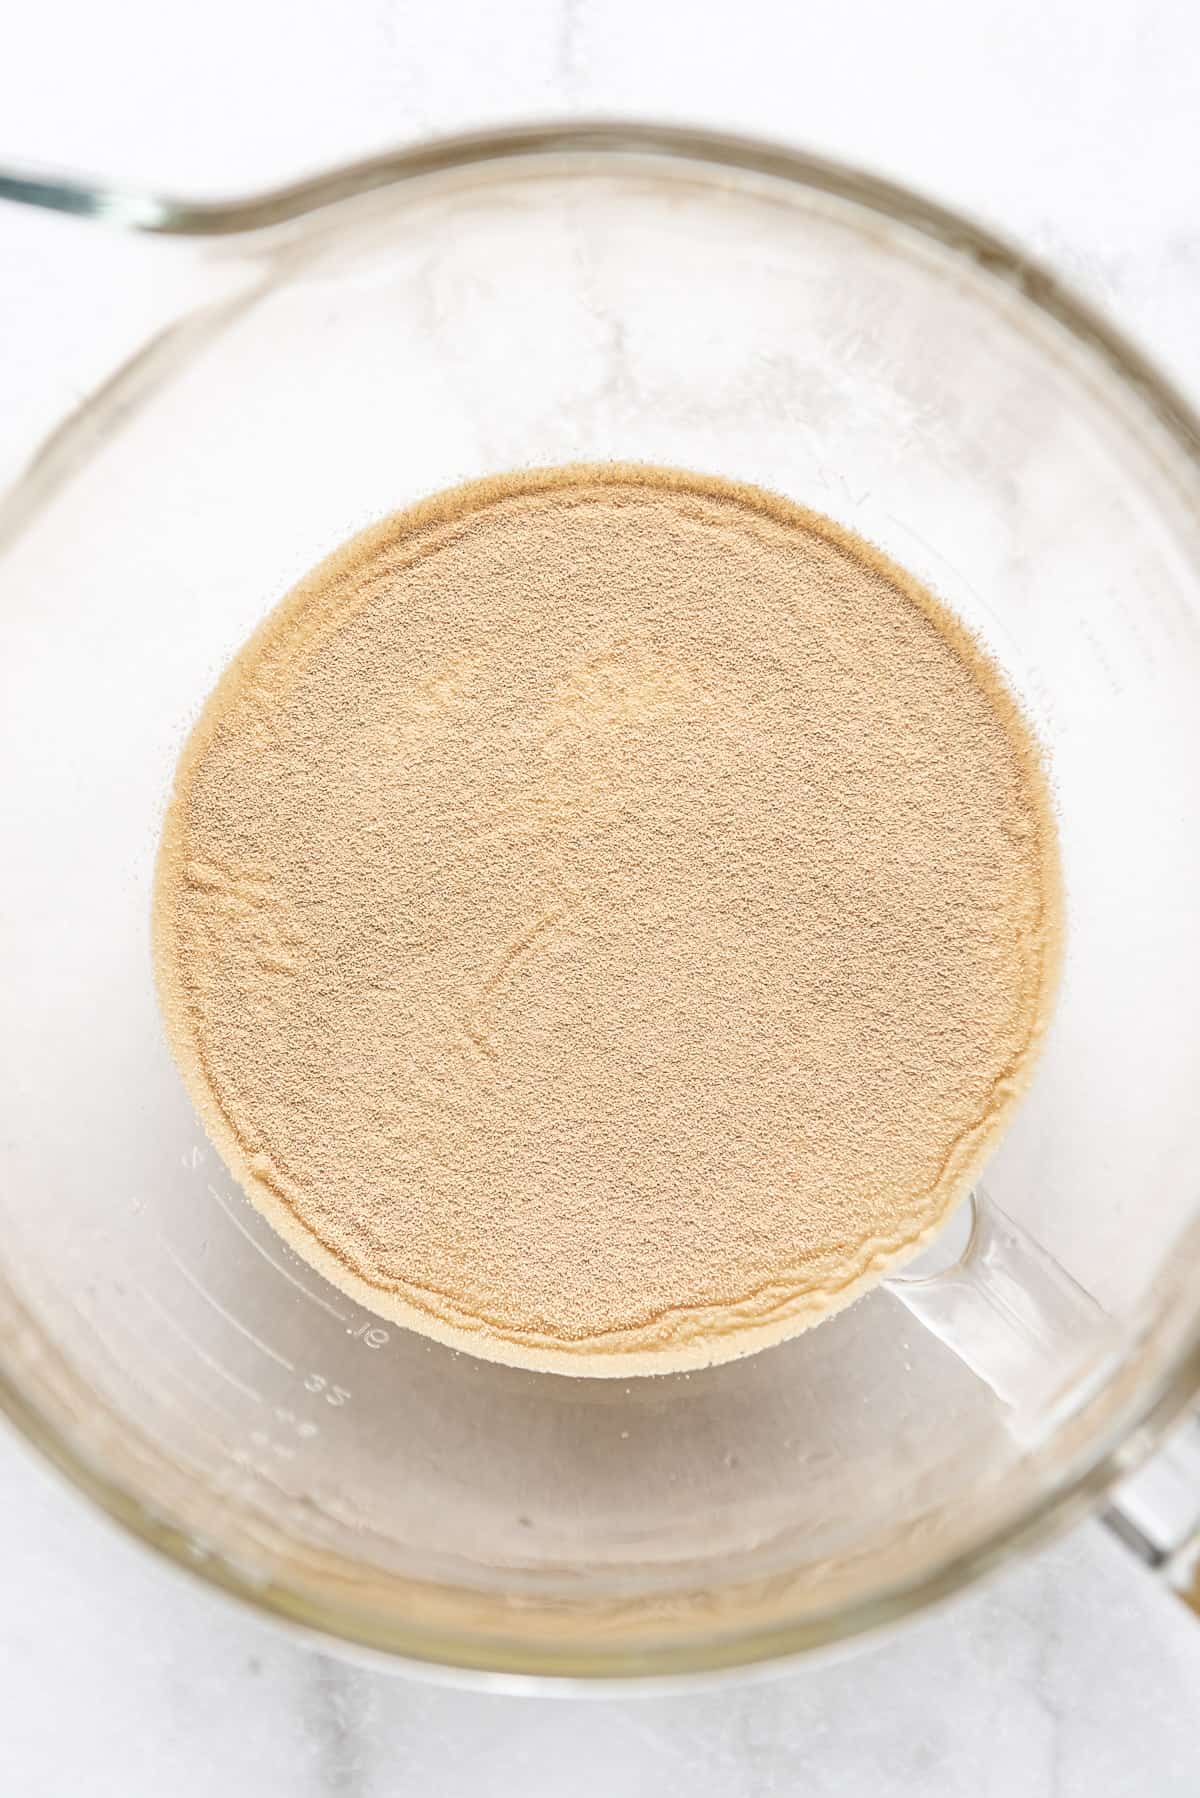
- Yeast: This recipe calls for active dry yeast, which requires proofing in warm water with a little sugar to “proof” it. If the yeast doesn’t get foamy within 5-10 minutes, chances are either that your water was too warm and you killed it, or the yeast is old and you should get new yeast. You could also just use instant yeast and skip the proofing step, if you prefer.
- Flour: Don’t be intimidated by this recipe calling for bread flour! I have made this Amish white bread dozens of times with all-purpose flour and it turns out excellent. Bread flour just gives a slightly chewier quality to the texture of the bread and is my preference when I have it on hand.
- Warm water: The key here is that the water should be warm, but not scalding hot. Technically it should be around 110°F but I never actually measure it. I always just get it from the tap where it feels pleasantly warm running over my hand.
How to make White Bread
- Start by combining the warm water, 1 tablespoon of the sugar, and the honey in a large mixing bowl. Stir in the yeast, then let it sit for 5-10 minutes until the yeast is bubbly and foamy. If the yeast isn’t foaming, you need to throw it out and start again.
- If your yeast doesn’t foam, it’s either because the water was too hot, or the yeast was too old (or it could be both). This sounds scarier than it actually is. In all my years I have never once had yeast that doesn’t foam.
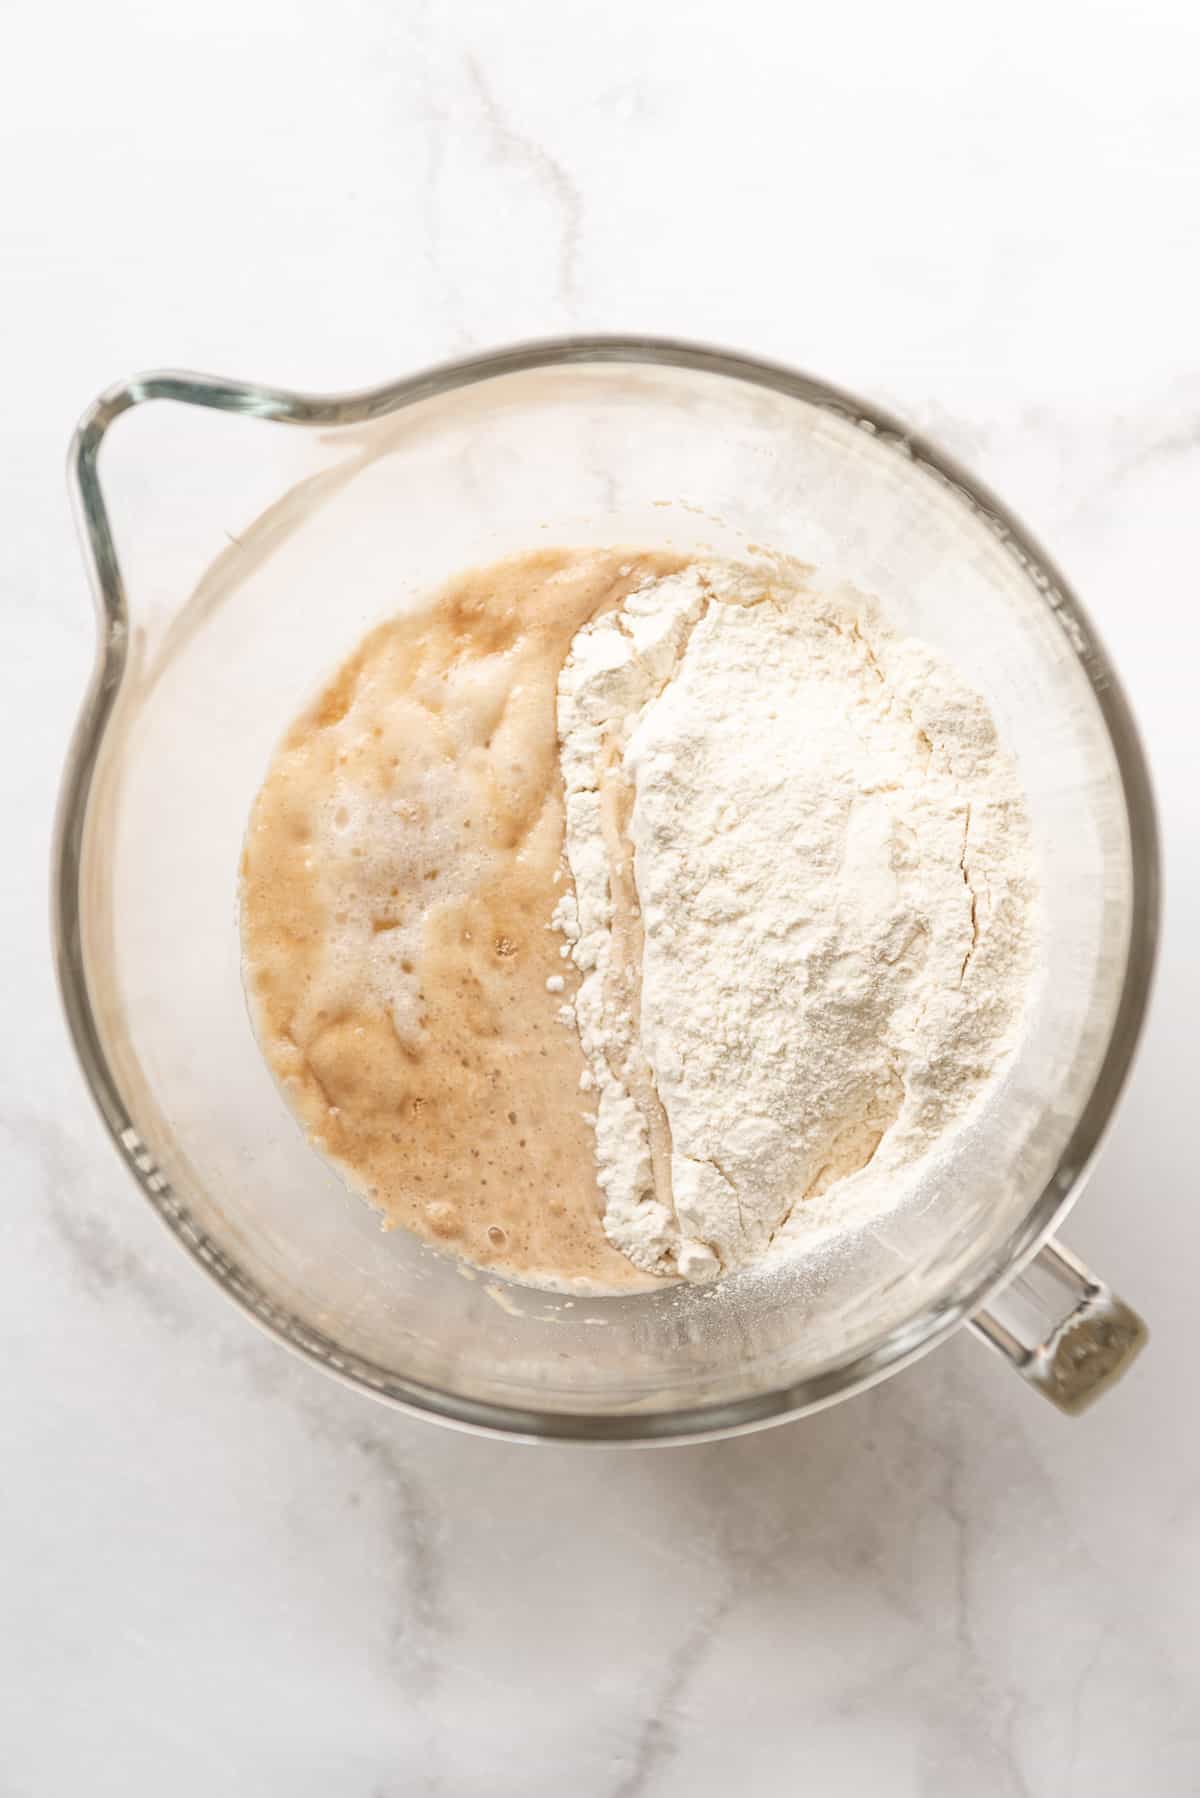
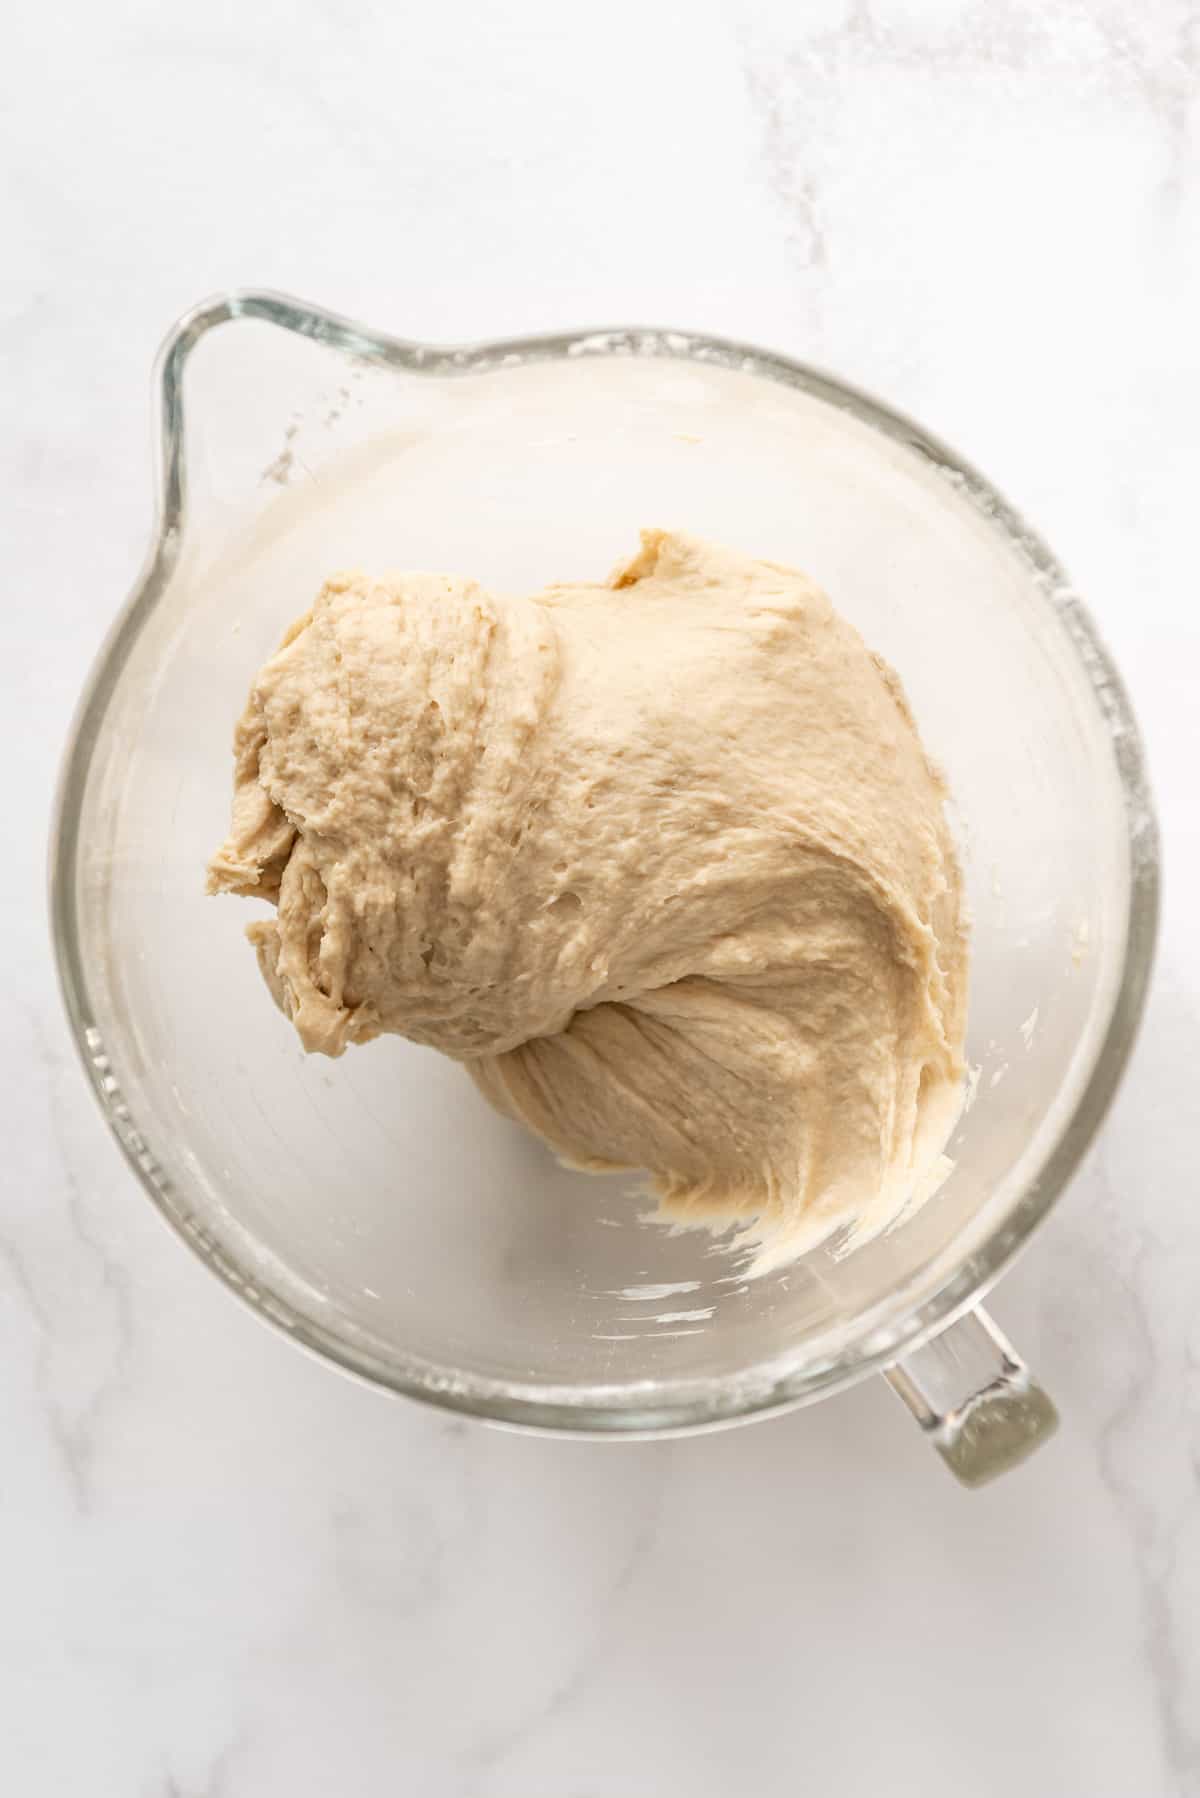
- Add the rest of the sugar to the proofed yeast along with the oil, salt, and 2 cups of the flour. Mix well to combine, then start adding the rest of the flour, 1 cup at a time, while mixing with the dough hook of your mixer. Once all of the flour has been added, knead on medium speed for 5-7 minutes until you have a nice smooth, supple dough that cleans the sides of the bowl.
- This can also be done by hand by using a sturdy wooden spoon to mix in the flour until you need to switch to kneading in the remaining flour by hand.
- I always like to turn out my dough onto a lightly floured surface and knead for the final minute just to shape it into a smooth ball and because with practice and time you will get to know the feel of your bread dough. This should be a very workable dough that isn’t overly sticky as long as your hands are dry. If you are sticking a ton, add a little more flour to your hands and surface and knead some of that in until the dough is easy to work with.
- Transfer the dough to a clean bowl (or the original bowl) with a little oil in the bottom. Turn the dough around to coat lightly in the oil, then cover with plastic wrap or a clean dish towel and let rise for about 1 hour until doubled in size.
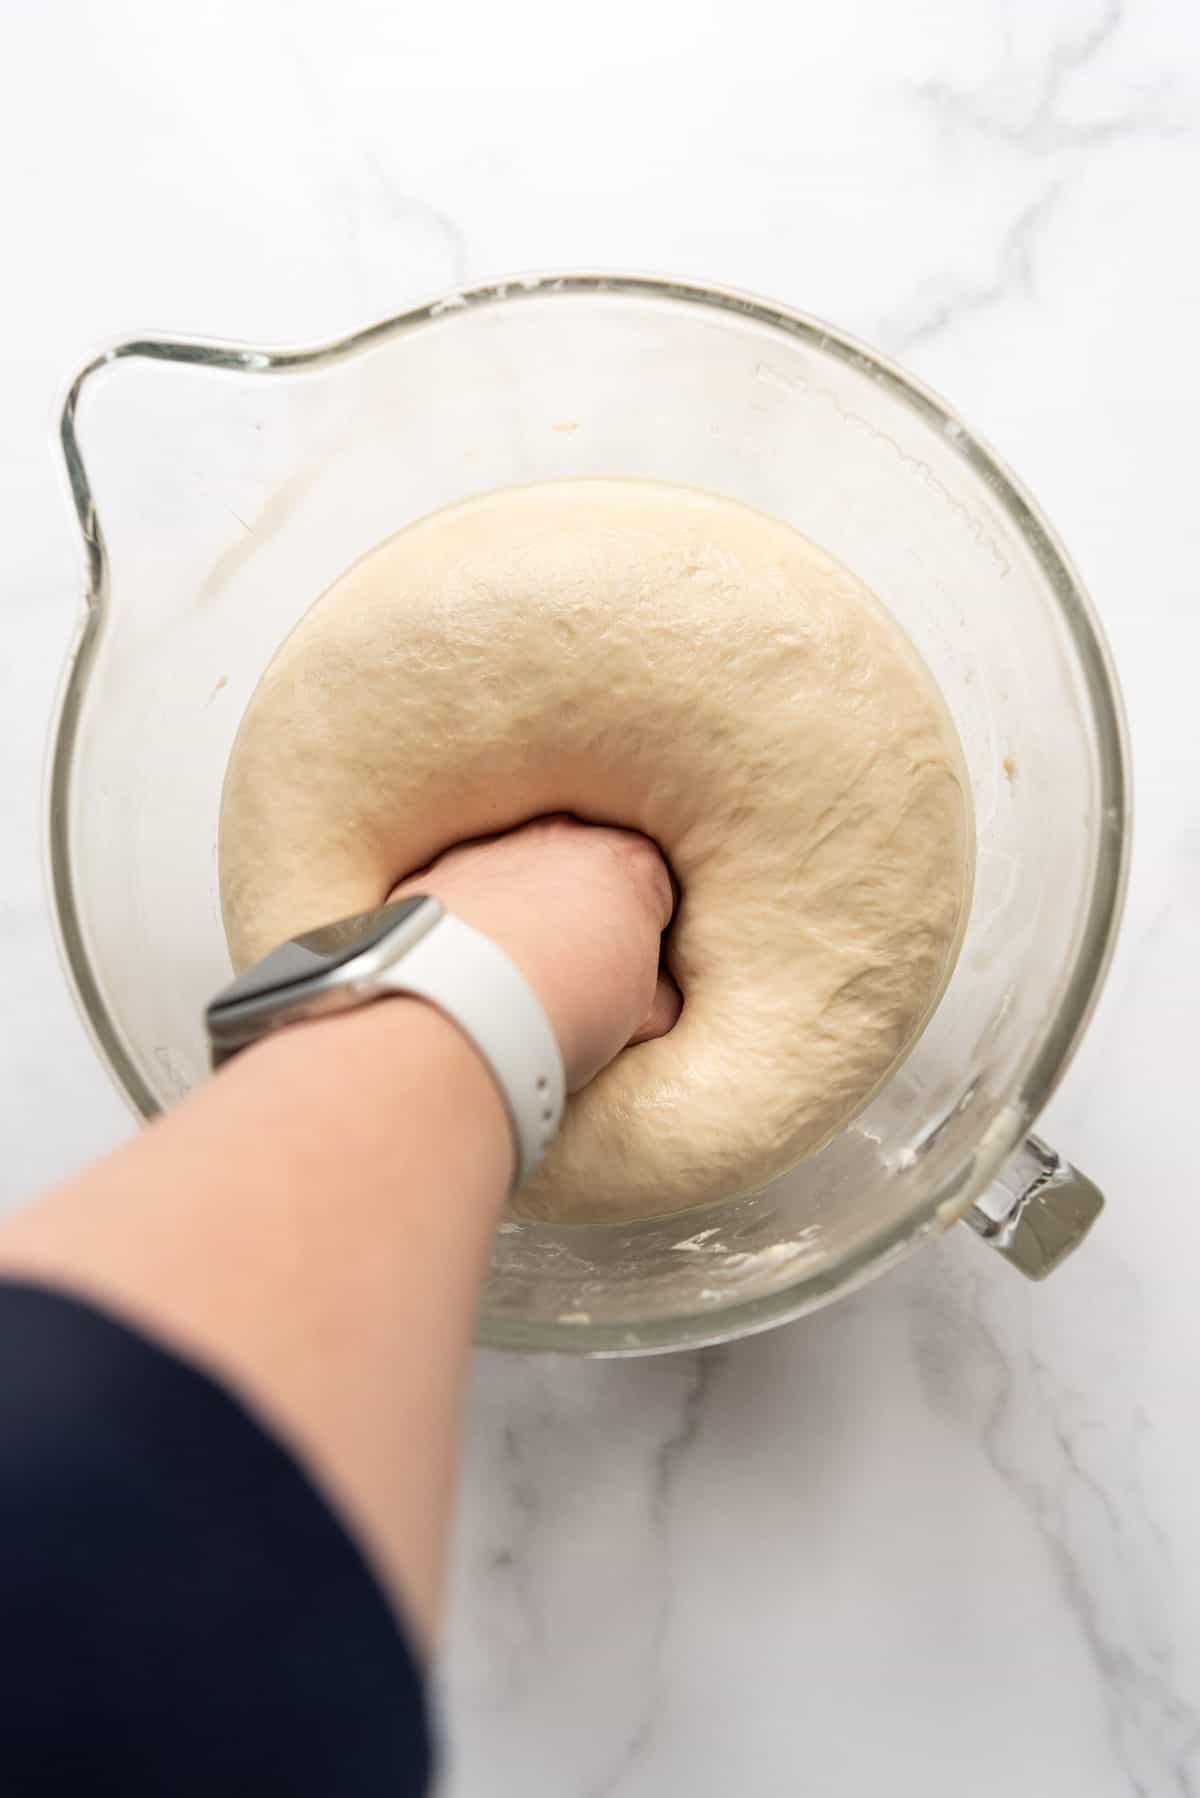
- Once the dough has doubled in size, punch it down by sticking your balled up fist right into the center of the bread dough to knock out some of the gases that have built up as the dough expanded.
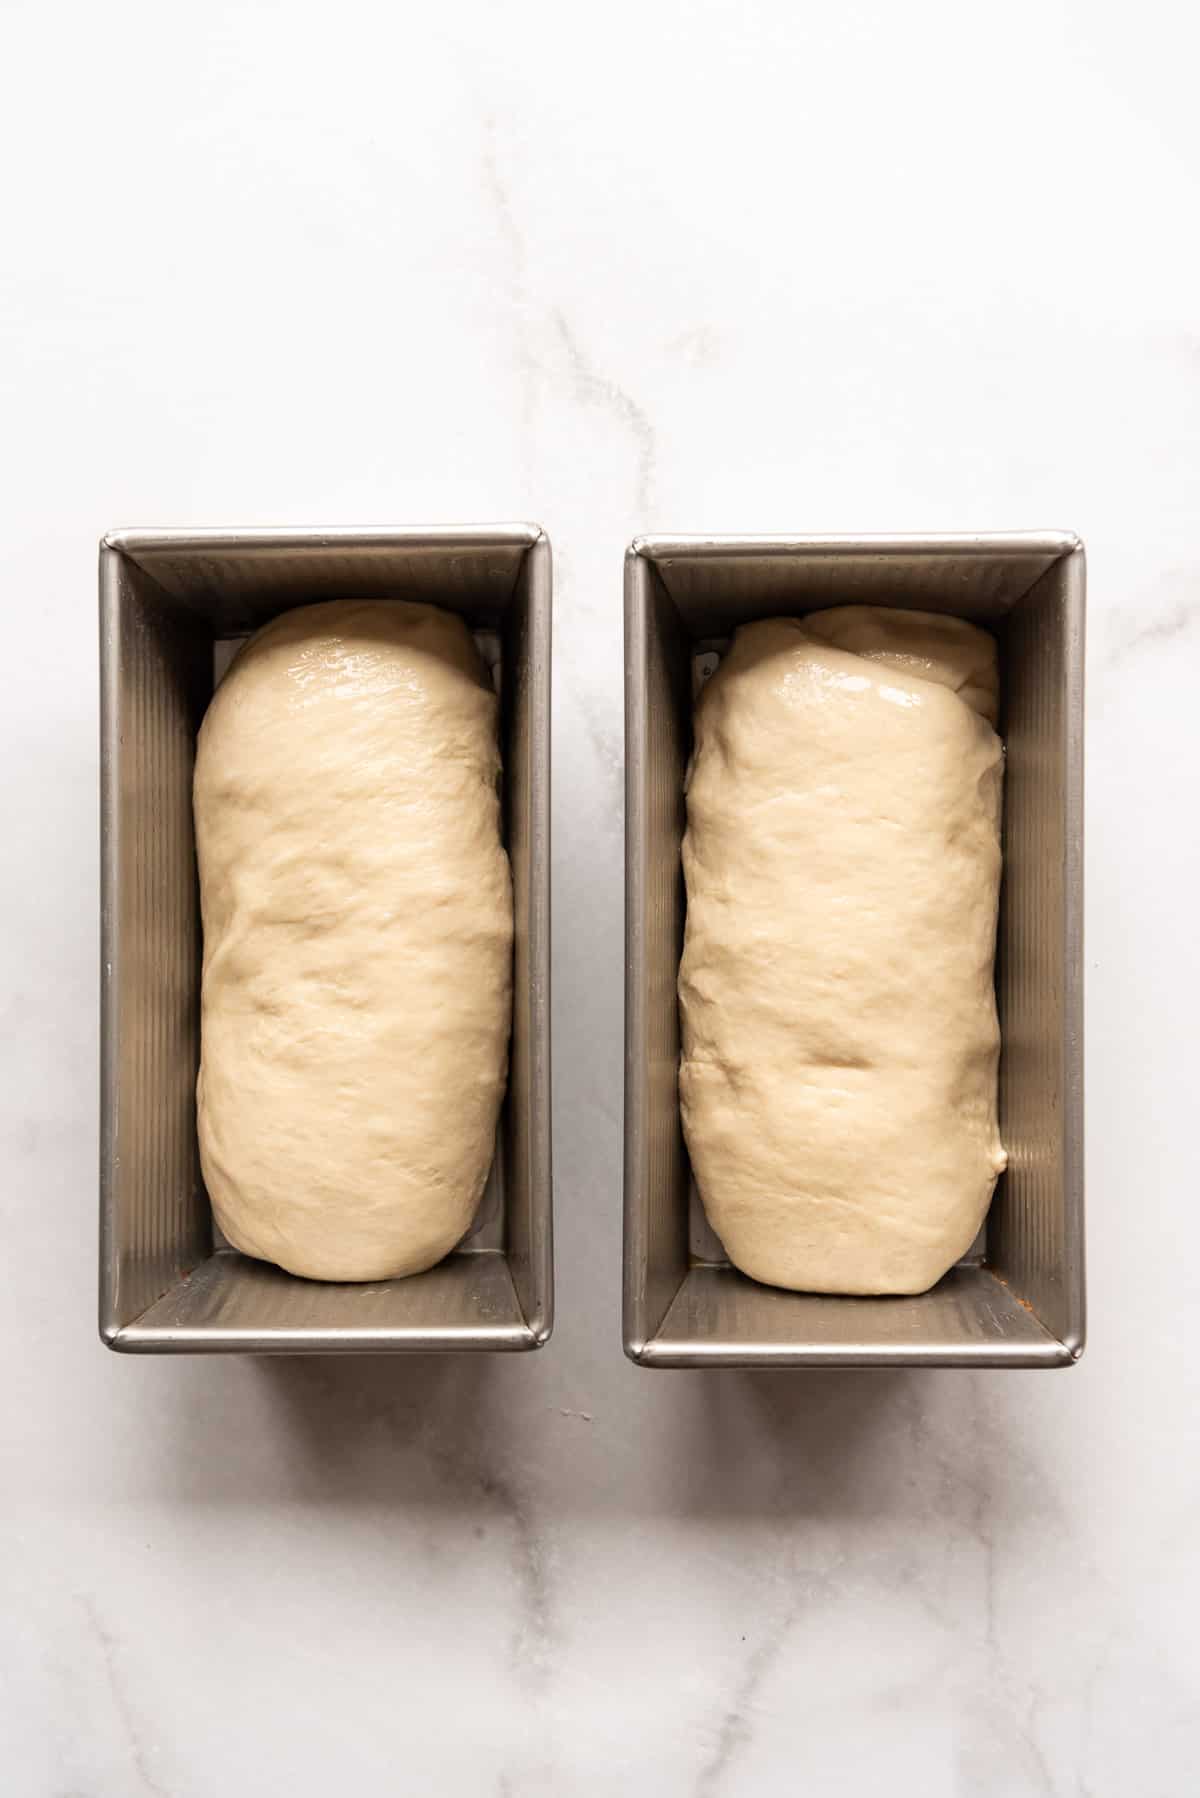
- Divide into two even mounds and shape into loaves. You can either pinch the larger ball of dough in half or use a bench scraper or sharp knife to cut it into two.
- Shape into oblong loaves by hand. One way to do this is to pat out the dough into a rough square and roll it up, then tuck the ends under. But you can also just shape them by hand so the loaves have a smooth top and edges tucked underneath the loaves in two lightly greased bread pans.
- Cover the bread pans with plastic wrap or your dish towel and let them rise again for 30-45 minutes.
- When the dough is close to being ready to bake, preheat the oven to 350°F. Bake for 28-30 minutes until the loaves are golden brown on top. You can also test it by thumping the bread for a hollow sound or testing it with a digital thermometer to see if it registers 190°F in the middle of the loaf, which is your best for getting bread that is done but still soft and moist without drying it out.
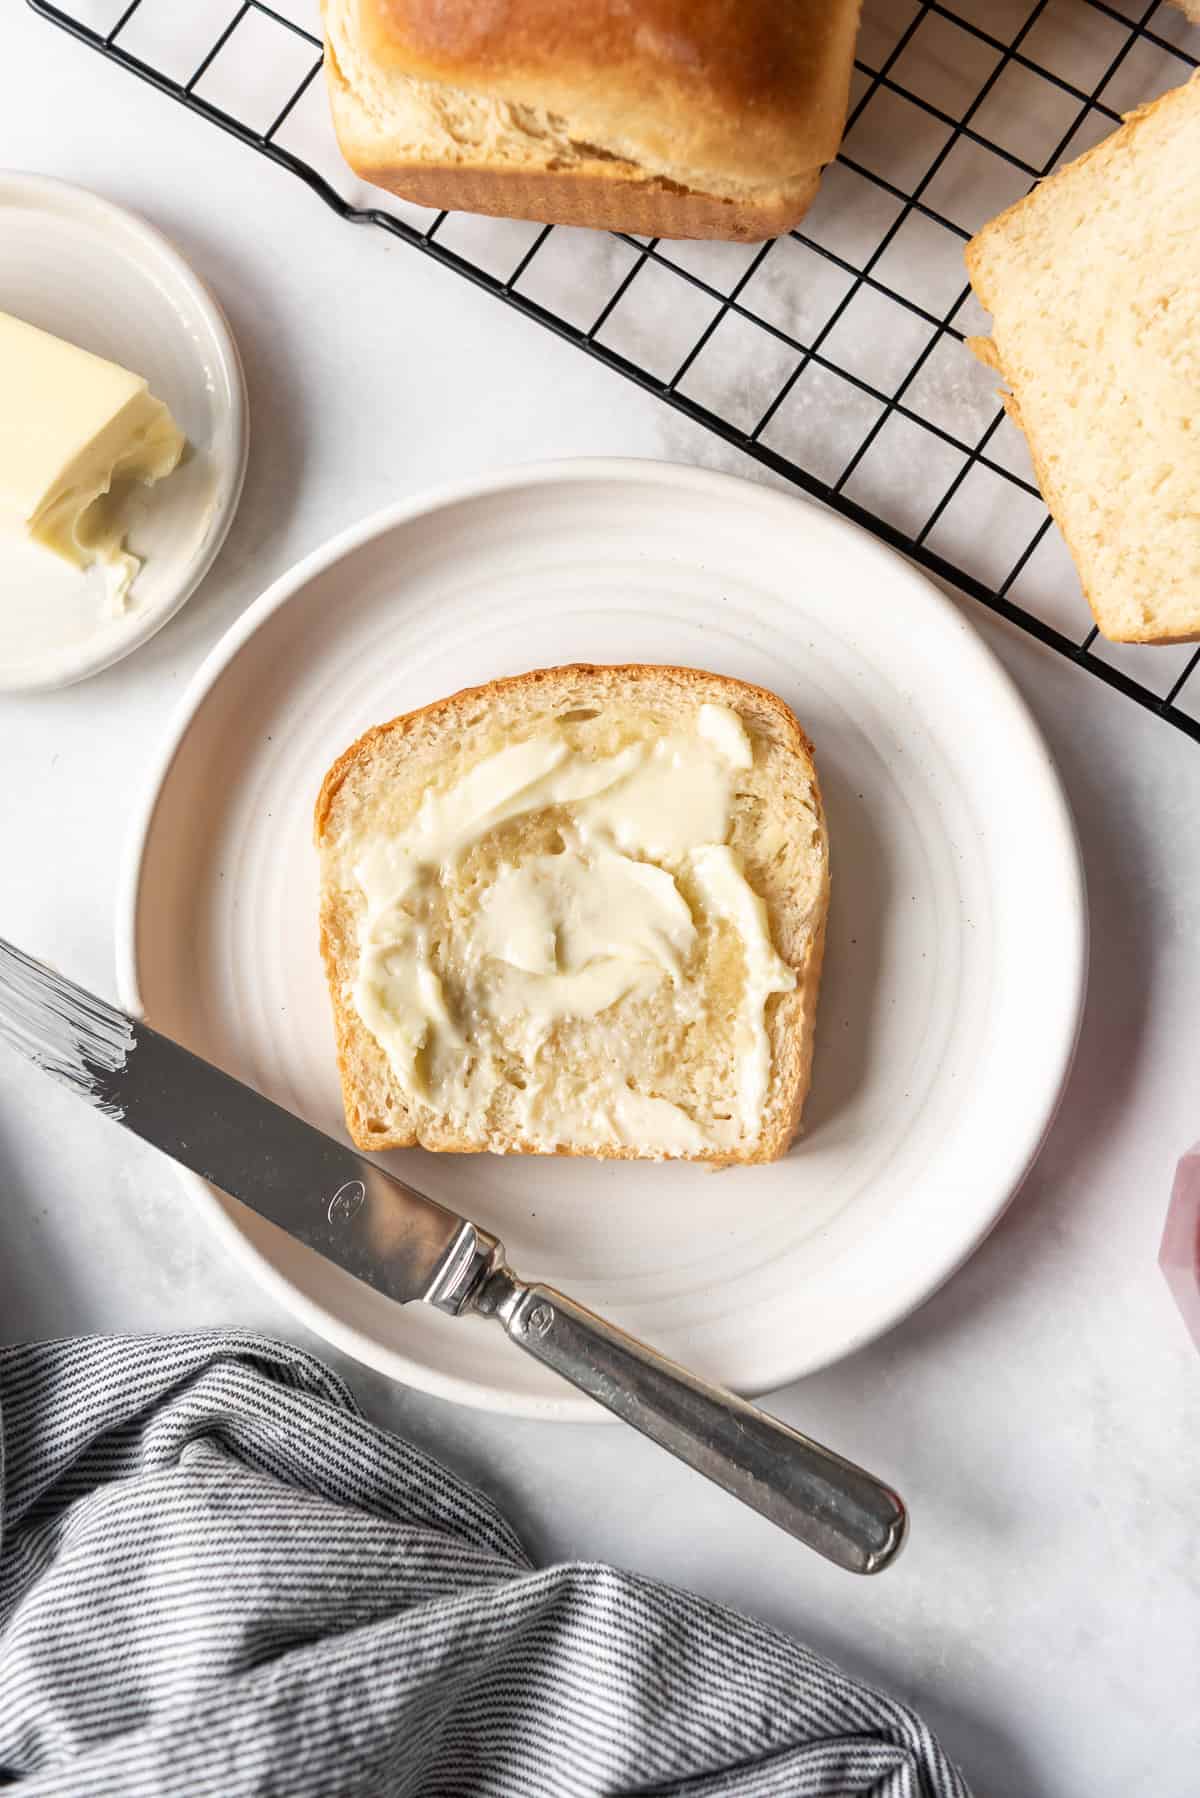
- The last step is to rub top crust of the loaves of Amish white bread while they are still hot with a stick of cold butter for a buttery finish that also helps keep the top crust soft. Or brush them with melted butter and a pastry brush. Either approach works. Turn the loaves out of the bread pans to cool on wire racks, then store in an airtight container to keep them fresh.

How to serve Amish White Bread
- Sandwiches – This is one of my favorite bread sandwiches! Fill it with your favorite meats and cheeses or butter and grill it with cheese in the middle for the best grilled cheese of your life!
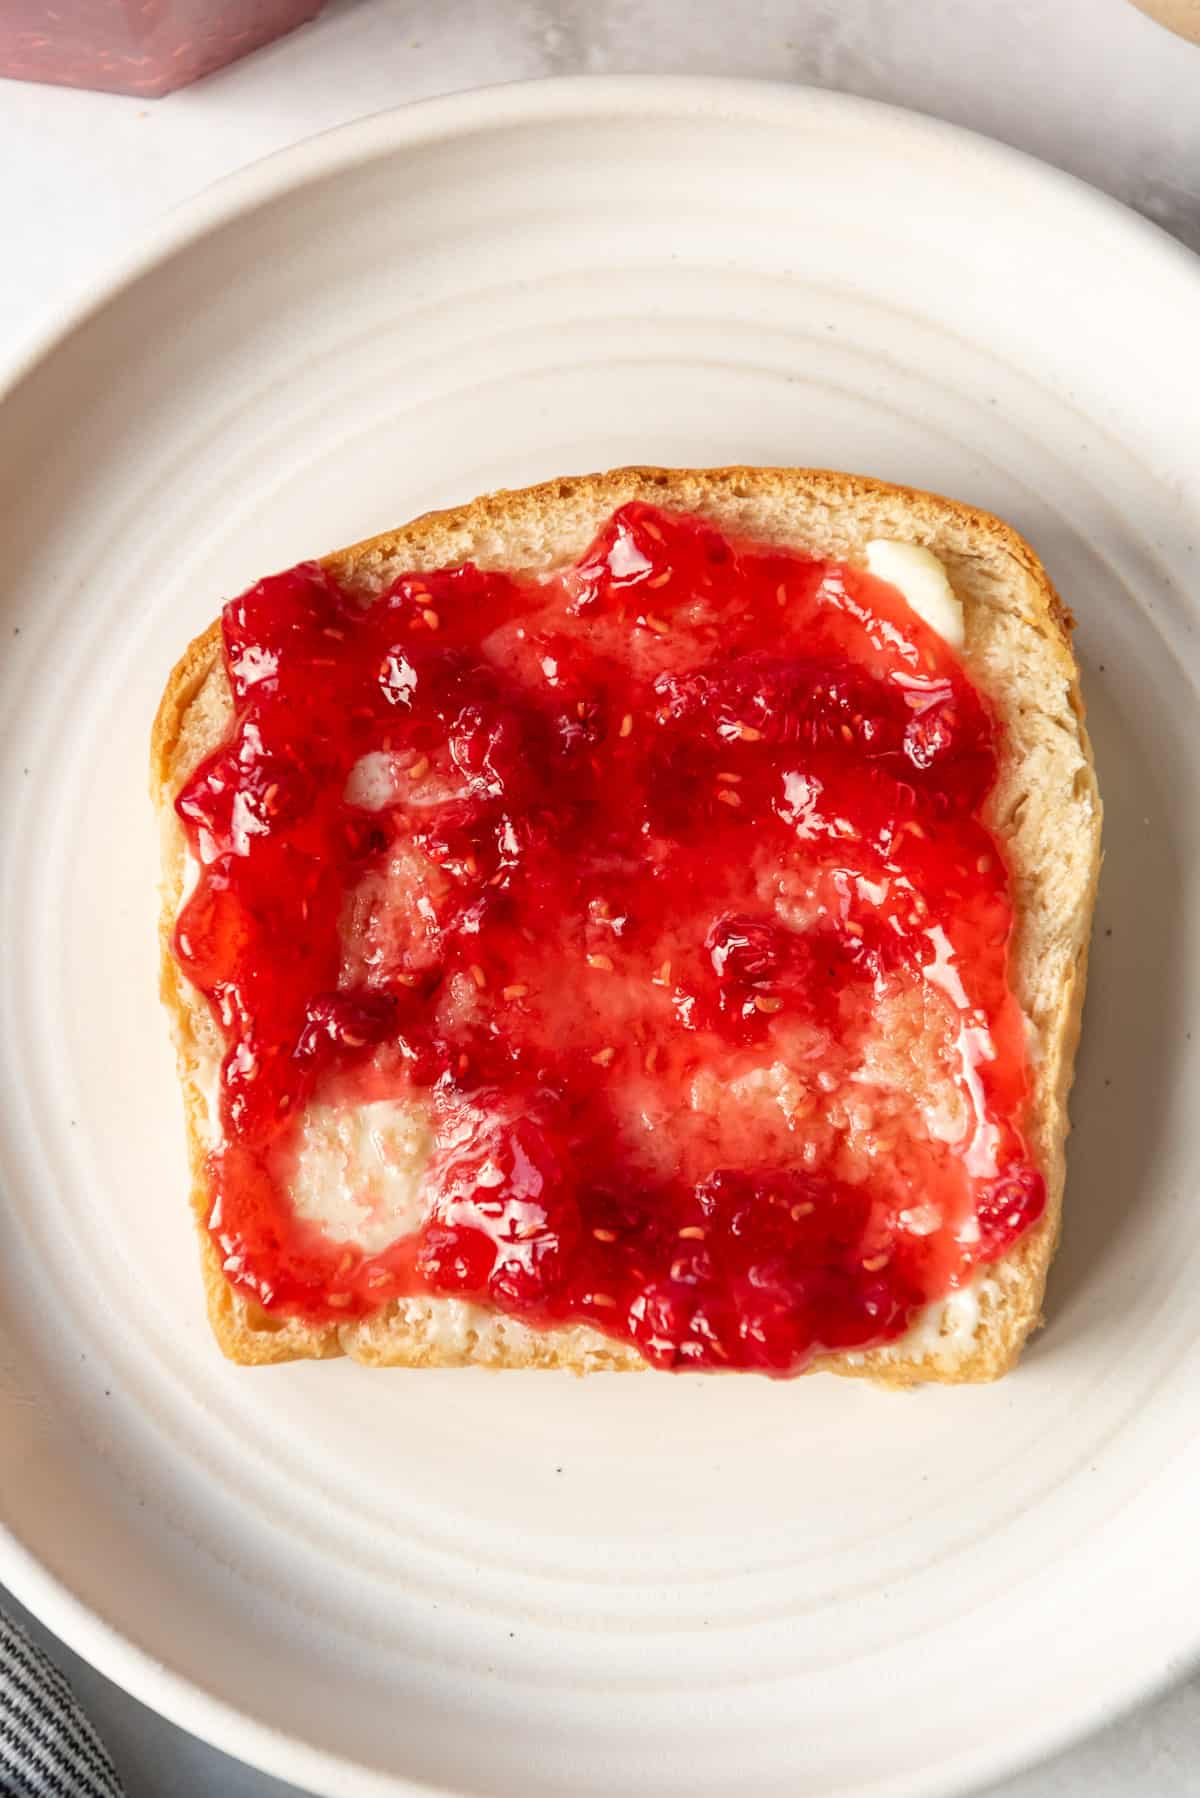
- Toast – There is nothing better than homemade bread when it is toasted and buttered. Bonus points for serving it with your favorite homemade jam! Mine’s peach freezer jam .
- Simple bread & butter – The best dinner side ever.
- Bread & milk – Maybe this is just my family, but my grandpa used to tear up slices of homemade bread in a bowl, sprinkle it with a little sugar, and pour milk over it. It was never my cup of tea, but he loved it and I remember him eating that every night whenever there was homemade bread around!
Amish White Bread Recipe storage
Wrap your warm loaves in a clean tea towel or dish cloth until they have cooled completely to keep them soft, then store in an airtight container for 4-5 days.
Freezing
You can certainly freeze a loaf to half on hand. Just let it cool completely, then wrap in a couple of layers of plastic wrap and stick the bread in a gallon-size Ziploc freezer bag for 2-3 months. Thaw before using.
Yes! Utahns & Idahoans love their “scones” which are really just fried bread dough, slightly different, but close to this fry bread recipe . Before punching down the dough, pinch or slice off small chunks of dough (a little larger than golf ball size), then flatten and stretch them into patties. Cut a small slit in the middle of each dough patty so that it will cook through evenly, then fry in a thin layer of hot oil in a frying pan, turning to brown each side. Serve hot dripping with honey, slathered with jam, or dusted with powdered sugar and a tall glass of cold milk on the side for a delicious treat. We usually make so many scones that I only have enough dough left for one full-size loaf of bread and a mini-loaf.
I’m not a gluten-free baker and definitely don’t have enough experience to answer this with any degree of confidence, sorry. I would recommend seeking out a reputable gluten-free bread recipe instead of just subbing gluten-free baking flour in this recipe.
I can only assume it’s because the simple bread recipe originated in Amish communities and spread from there, but the recipe has been passed on so many times that it’s hard to say whether that’s true. It just seems like the kind of wholesome, humble fare that the Amish would make though, doesn’t it?
The purpose of kneading is to develop the gluten in the flour. This gives it a chewy texture, but also helps make the bread lighter and fluffier.
White bread is usually made from wheat flour that has had the bran and germ removed, leaving only the starchy endosperm. This results in a flour with a lower protein content, which is primarily responsible for the soft texture. High-protein flours, like those used in whole wheat or artisan breads, create a stronger gluten network, leading to a denser and chewier texture. White flour is also finely milled, which further contributes to its softness. The fine particles in the flour result in a smoother dough, allowing it to trap air and water more effectively during the mixing and rising process, leading to a lighter, softer texture.
Letting bread dough rise for an extended period can indeed make it fluffier, but there’s a limit to how long you should let it rise. The fermentation process during rising allows yeast to produce carbon dioxide gas, which gets trapped in the dough, causing it to expand and become lighter and fluffier. But be careful not to overproof your loaf which can cause the bread to deflate.
My white bread recipe is the perfect balance of simple ingredients with white flour and a solid rise time so you get a light, fluffy slice every time. It’s a great beginner bread recipe if you are new to breadmaking.
White Bread Recipe tips
- Soft, buttery tops: Rubbing the top of each loaf with a cold stick of butter right when they come out of the oven makes it so, so good and keeps the crust nice and tender.
- Rise in a warm spot: I like to let my bread dough rise in a sunny window or on the counter by the stove where it’s warm. But I have heard of using your instant pot on the yogurt setting to rise the bread in half the time. And if your house is really cold, you could set an empty oven to 200°F for 10 minutes, then turn it off and set your bread in there to rise. Just don’t forget it’s in there and start preheating the oven for something else.
MoreHomemade Bread RecipesYou’ll Love
- Sweet Molasses Brown Bread
- Homemade French Bread
- Easy Homemade Rye Bread
- Homemade Potato Bread Recipe
Did you make this recipe?
Let me know what you thought with a comment and rating below. You can also take a picture and tag me on Instagram @houseofnasheats or share it on the Pinterest pin so I can see.
Amish White Bread Recipe
Equipment
- 8.5 x 4.5-Inch Bread Loaf Pans
Ingredients123
- ▢ 2 cups (475g) warm water (around 100-110°F)
- ▢ 1/3 cup (67g) granulated sugar
- ▢ 2 Tablespoons honey
- ▢ 1 1/2 Tablespoons instant yeast or active dry yeast
- ▢ 1/4 cup vegetable or canola oil
- ▢ 1 1/2 teaspoons salt
- ▢ 5 ½ to 6 cups (846g) bread flour scooped & leveled
- ▢ 2 Tablespoons salted butter for brushing or rubbing on top of the finished loaves

Instructions
- In a large bowl of a stand mixer with a dough hook attachment, add the warm water, sugar, honey and yeast and stir to combine. Allow the yeast to proof until foamy, about 5-10 minutes. 2 cups (475g) warm water, ⅓ cup (67g) granulated sugar, 2 Tablespoons honey, 1 ½ Tablespoons instant yeast
- Once the yeast is bubbly, add the oil, salt, and 2 cups of flour and mix well. Continue adding flour, one cup at a time, kneading with the dough hook on medium speed until the dough is smooth, about 5-7 minutes. This can also be done by hand for 8-10 minutes instead if you don’t have a mixer with a dough hook attachment. ¼ cup vegetable or canola oil, 1 ½ teaspoons salt, 5 ½ to 6 cups (846g) bread flour
- Transfer the smooth, elastic dough to a large greased bowl, turning the bread dough to coat it lightly in the oil. Cover with plastic wrap and let the dough rise until doubled in size, about 1 hour.
- Once the dough has risen, punch it down (literally just make a fist and push it once or twice right in the center of the risen dough). Divide the dough in half and shape into loaves by forming two oblong logs and placing each loaf into two oiled 9×5-inch bread pans. Cover loosely with plastic wrap or a clean cloth and allow the loaves to rise for another 30-45 minutes, or until dough has risen about 1 inch above pans.
- When the dough is close to being ready to bake, preheat the oven to 350°F. Bake for 28-30 minutes, until the tops are golden brown. The loaves should have a hollow sound when you thump them and register 190°F on a digital thermometer stuck into the center of each loaf.
- Rub the top of each hot loaf of bread with a cold stick of butter or brush with melted butter (whichever approach is easiest for you), then turn the loaves out onto a clean cloth or cooling rack. Slice and use for sandwiches, toast, or just slathered with butter, honey, or jam. 2 Tablespoons salted butter
Notes
- Storage: Wrap your warm loaves in a clean tea towel or dish cloth until they have cooled completely to keep them soft, then store in an airtight container for 4-5 days.
- Freezing: You can certainly freeze a loaf to half on hand. Just let it cool completely, then wrap in a couple of layers of plastic wrap and stick the bread in a gallon-size Ziploc freezer bag for 2-3 months. Thaw before using.
- Overnight bread: You can do one of the rises in the refrigerator (either the initial rise or the rise after shaping the loaves) for up to 12 hours.
- Measuring flour: I calculated the grams using the scoop & level approach to measuring flour, which I think is the most common approach for the majority of home bakers.
- Soft, buttery tops: Rubbing the top of each loaf with a cold stick of butter right when they come out of the oven makes it so, so good and keeps the crust nice and tender.
- Rise in a warm spot: I like to let my bread dough rise in a sunny window or on the counter by the stove where it’s warm. But I have heard of using your instant pot on the yogurt setting to rise the bread in half the time. And if your house is really cold, you could set an empty oven to 200°F for 10 minutes, then turn it off and set your bread in there to rise. Just don’t forget it’s in there and start preheating the oven for something else.
- Utah scones (aka fry bread): Before punching down the dough, this recipe works well for making fry bread or Utah scones by pinching off small chunks of dough (a little larger than golf ball size), and flattening and stretching them by hand into patties. Cut a small slit in the middle of each dough patty so that it will cook through evenly, then fry in a thin layer of hot oil in a frying pan, turning to brown each side. Serve hot with honey, jam, or powdered sugar and a glass of cold milk.
Nutrition
This post was originally published in November, 2016. The photos and content were updated in January, 2022.
Amish White Bread Recipe
Equipment
- 8.5 x 4.5-Inch Bread Loaf Pans
Ingredients
- 2 cups (475g) warm water (around 100-110°F)
- 1/3 cup (67g) granulated sugar
- 2 Tablespoons honey
- 1 1/2 Tablespoons instant yeast or active dry yeast
- 1/4 cup vegetable or canola oil
- 1 1/2 teaspoons salt
- 5 1/2 to 6 cups (846g) bread flour scooped & leveled
- 2 Tablespoons salted butter for brushing or rubbing on top of the finished loaves
Instructions
- In a large bowl of a stand mixer with a dough hook attachment, add the warm water, sugar, honey and yeast and stir to combine. Allow the yeast to proof until foamy, about 5-10 minutes. 2 cups (475g) warm water, 1/3 cup (67g) granulated sugar, 2 Tablespoons honey, 1 1/2 Tablespoons instant yeast
- Once the yeast is bubbly, add the oil, salt, and 2 cups of flour and mix well. Continue adding flour, one cup at a time, kneading with the dough hook on medium speed until the dough is smooth, about 5-7 minutes. This can also be done by hand for 8-10 minutes instead if you don’t have a mixer with a dough hook attachment. 1/4 cup vegetable or canola oil, 1 1/2 teaspoons salt, 5 1/2 to 6 cups (846g) bread flour
- Transfer the smooth, elastic dough to a large greased bowl, turning the bread dough to coat it lightly in the oil. Cover with plastic wrap and let the dough rise until doubled in size, about 1 hour.
- Once the dough has risen, punch it down (literally just make a fist and push it once or twice right in the center of the risen dough). Divide the dough in half and shape into loaves by forming two oblong logs and placing each loaf into two oiled 9x5-inch bread pans. Cover loosely with plastic wrap or a clean cloth and allow the loaves to rise for another 30-45 minutes, or until dough has risen about 1 inch above pans.
- When the dough is close to being ready to bake, preheat the oven to 350°F. Bake for 28-30 minutes, until the tops are golden brown. The loaves should have a hollow sound when you thump them and register 190°F on a digital thermometer stuck into the center of each loaf.
- Rub the top of each hot loaf of bread with a cold stick of butter or brush with melted butter (whichever approach is easiest for you), then turn the loaves out onto a clean cloth or cooling rack. Slice and use for sandwiches, toast, or just slathered with butter, honey, or jam. 2 Tablespoons salted butter
Notes
- Storage: Wrap your warm loaves in a clean tea towel or dish cloth until they have cooled completely to keep them soft, then store in an airtight container for 4-5 days.
- Freezing: You can certainly freeze a loaf to half on hand. Just let it cool completely, then wrap in a couple of layers of plastic wrap and stick the bread in a gallon-size Ziploc freezer bag for 2-3 months. Thaw before using.
- Overnight bread: You can do one of the rises in the refrigerator (either the initial rise or the rise after shaping the loaves) for up to 12 hours.
- Measuring flour: I calculated the grams using the scoop & level approach to measuring flour, which I think is the most common approach for the majority of home bakers.
- Soft, buttery tops: Rubbing the top of each loaf with a cold stick of butter right when they come out of the oven makes it so, so good and keeps the crust nice and tender.
- Rise in a warm spot: I like to let my bread dough rise in a sunny window or on the counter by the stove where it’s warm. But I have heard of using your instant pot on the yogurt setting to rise the bread in half the time. And if your house is really cold, you could set an empty oven to 200°F for 10 minutes, then turn it off and set your bread in there to rise. Just don’t forget it’s in there and start preheating the oven for something else.
- Utah scones (aka fry bread): Before punching down the dough, this recipe works well for making fry bread or Utah scones by pinching off small chunks of dough (a little larger than golf ball size), and flattening and stretching them by hand into patties. Cut a small slit in the middle of each dough patty so that it will cook through evenly, then fry in a thin layer of hot oil in a frying pan, turning to brown each side. Serve hot with honey, jam, or powdered sugar and a glass of cold milk.
Nutrition
QR code
Scan this QR code with your phone’s camera to view this recipe on your mobile device.
