


Blackberry Plum Jam is a delicious way to preserve the rich flavors of blackberry season and enjoy the sweetness of fresh plums all year round! This easy recipe uses simple ingredients and is perfect for beginners and experienced jam makers alike. Whether you have a plum tree in your backyard or picked up fruit from the grocery store, this jam will become one of your favorites!

This Blackberry Plum Jam recipe is made with just a few basic ingredients that are bursting with vibrant flavors. The natural sweetness of ripe plums pairs beautifully with the tartness of fresh blackberries, giving you a jam that’s both rich and balanced. Plus, the fresh lemon juice adds a bright, zesty kick that enhances the overall flavor!
Whether you’re a master food preserver or making jam for the first time, this blackberry plum jam is an excellent way to use up lots of plums if you’ve got a bumper crop from your plum tree or local farmers. And if you’re into canning, the water bath canner ensures a good seal, allowing your jam to last for months in the pantry. Plus, the finished jars make lovely gifts, so you can share the fruity goodness with friends and family!
Need more recipe ideas to use up your blackberries? Don’t miss my recipes for Southern Blackberry Cobbler Ice Cream , Easy Blackberry Turnovers , Best Recipe for Blackberry Pie , Blackberry Scones , and Blackberry Swirl Ice Cream !
Why We Love This Recipe
- This blackberry plum jam is packed with natural pectin from the fruit, which means it sets perfectly without needing a lot of added ingredients.
- The combination of fresh blackberries and plums creates a jam with a unique flavor profile—rich, fruity, with just the right amount of sweetness and tang.
- It’s a versatile recipe that works whether you’re making a small batch to keep in the fridge or preserving a larger batch for long-term storage.

What You’ll Need
Scroll down to the recipe card below this post for ingredient quantities and full instructions.
- Fresh Blackberries – Provide the tartness and deep color, making the jam rich in flavor.
- Fresh Ripe Plums – Any variety works, adding sweetness and natural pectin for thickening.
- Granulated Sugar – Essential for sweetness and helping the jam set.
- Fruit Pectin – A bit of insurance for a perfect set, especially if your fruit is low in natural pectin.
- Juice of Lemon – Enhances the flavor and helps with setting.
- Salted Butter – Keeps the jam from foaming too much during cooking, ensuring a smooth texture.

How to Make Blackberry Plum Jam
- Prepare jars. Wash four 8-ounce jars in hot, soapy water or in the dishwasher. Set them aside to dry completely.
- Prep fruit. Wash and drain the blackberries. For the plums, wash them, slice them in half, and remove the pits. No need to peel, as the skin will break down during cooking.
- Cook jam. In a large saucepan or preserving pan, combine the blackberries, plums, sugar, pectin, lemon juice, and butter. Bring the mixture to a full rolling boil over medium-high heat, stirring constantly. Allow it to boil for 3 minutes.

- Simmer and check the set. Lower the heat to medium-low and simmer for 20-30 minutes, stirring frequently. Once the jam reaches 220°F, remove it from heat.

- Wrinkle test. To check if the jam has reached the setting point, you can use the wrinkle test on a frozen plate. Freeze a plate for 15 minutes, spoon some hot jam onto it, then push it with your finger. If it wrinkles and doesn’t run back, the jam is set. If not, simmer for five more minutes and try again.
- Jar the jam. Let it cool slightly, then ladle the hot jam into the jars, leaving a 1/4-inch space at the top. Wipe the rims clean, secure the lids, and process in a boiling water canner for long-term storage, or refrigerate for immediate use.


Yes, you can use frozen blackberries and plums. Just make sure they are fully thawed before starting the cooking process.
No, there’s no need to peel the plums. The skins will break down during cooking, adding flavor and color to the jam.
If properly sealed using the water bath canning method, this jam will last up to 18 months in a cool, dry place. In the refrigerator, it will stay fresh for up to 3 weeks.
The wrinkle test is a simple way to check if your jam has reached the right consistency. Place a small plate in the freezer before cooking. When you think the jam is ready, spoon a dollop of jam onto the cold plate and push it with your finger. If it wrinkles, the jam has set.
Yes! You can freeze this jam for up to 1 year. Just make sure to leave enough room in the jars for the jam to expand as it freezes.

Tips for Success
- Make sure your fruit is ripe and juicy—this brings out the best flavor in your jam.
- Stir often while cooking to prevent the jam from sticking or scorching at the bottom of the pan.
- Don’t skip the lemon juice! It helps balance the sweetness and aids in setting the jam.
- Use a thermometer if you can. The jam sets perfectly at 220°F, so it’s a handy tool for accuracy.
- Always sterilize your jars beforehand to ensure your jam stays fresh and safe for storage.
What to Serve with Blackberry Plum Jam
This blackberry plum jam is incredibly versatile. Spread it on warm, buttery Homemade French Toast for a sweet start to your day, or onto a slice of German Pancake for a burst of fruity flavor!
It’s also fantastic paired with cheese boards —try it with a sharp cheddar or creamy brie for a delightful contrast.
For a fun twist, use it as a filling for Easy Jam Thumbprint Cookies or even as a topping for ice cream !

Substitutions and Variations
- Swap fresh blackberries with raspberries or blueberries for a different berry flavor.
- Use honey instead of sugar for a more natural sweetness, but keep in mind the consistency may be slightly thinner.
- If you prefer a smoother texture, blend the jam with an immersion blender before simmering to get rid of any fruit chunks.
- Add a pinch of cinnamon or nutmeg to bring warm, spicy notes to the jam.
- For a seedless version, strain the blackberries before cooking to remove the seeds.

Delicious Jam & Spread Recipes to Try Next
- Peach Freezer Jam
- Whipped Cinnamon Honey Butter
- Homemade Nutella
- Raspberry Butter
- Bacon Jam
- Crockpot Apple Butter
- Easy Homemade Lemon Curd
- Pumpkin Butter

Small Batch Blackberry Plum Jam
Ingredients123
- ▢ 2 cups fresh blackberries
- ▢ 2 pounds fresh ripe plums (any variety)
- ▢ 3 cups granulated sugar
- ▢ 2 Tablespoons fruit pectin
- ▢ Juice of 1 lemon
- ▢ 1 Tablespoons salted butter

Instructions
- Wash four 8-ounce jars in the dishwasher to sterilize them. Set aside.
- Wash and drain blackberries. Wash plums and slice them in half, removing the stone.
- Add the blackberries, plums, sugar, pectin, lemon juice, and butter in a medium saucepan over medium-high heat. Bring to a boil for 3 minutes.
- Reduce heat to medium-low and simmer for about 30 minutes or until a digital thermometer reads 220°F. Stir regularly to prevent the jam from scorching.
- Remove from the heat and allow to come to room temperature.
- Fill each jar, leaving 1/4-inch space at the top of each jar. Gently tap the jars on the counter to remove any air bubbles.
- Wipe the tops of the jars clean, then twist on the lids and store in the refrigerator for up to 3 weeks, in the freezer for up to 1 year, or preserve using the water-bath method, which will let them keep for 18 months in the pantry.
Notes
Storage & Make Ahead
- Store: Keep your opened jam jars in the fridge for up to 3 weeks. Just make sure the lids are tightly sealed!
- Freeze: Want to save some for later? Pour your jam into freezer-safe containers, leaving space at the top. It will keep well in the freezer for up to a year.
- Reheat: To enjoy it warm, microwave a spoonful of jam for a few seconds or let the jar sit at room temperature for a bit.
- Make Ahead: This jam is perfect for making ahead! Prepare a big batch and store it using the water bath method, so you can enjoy your jam for up to 18 months.
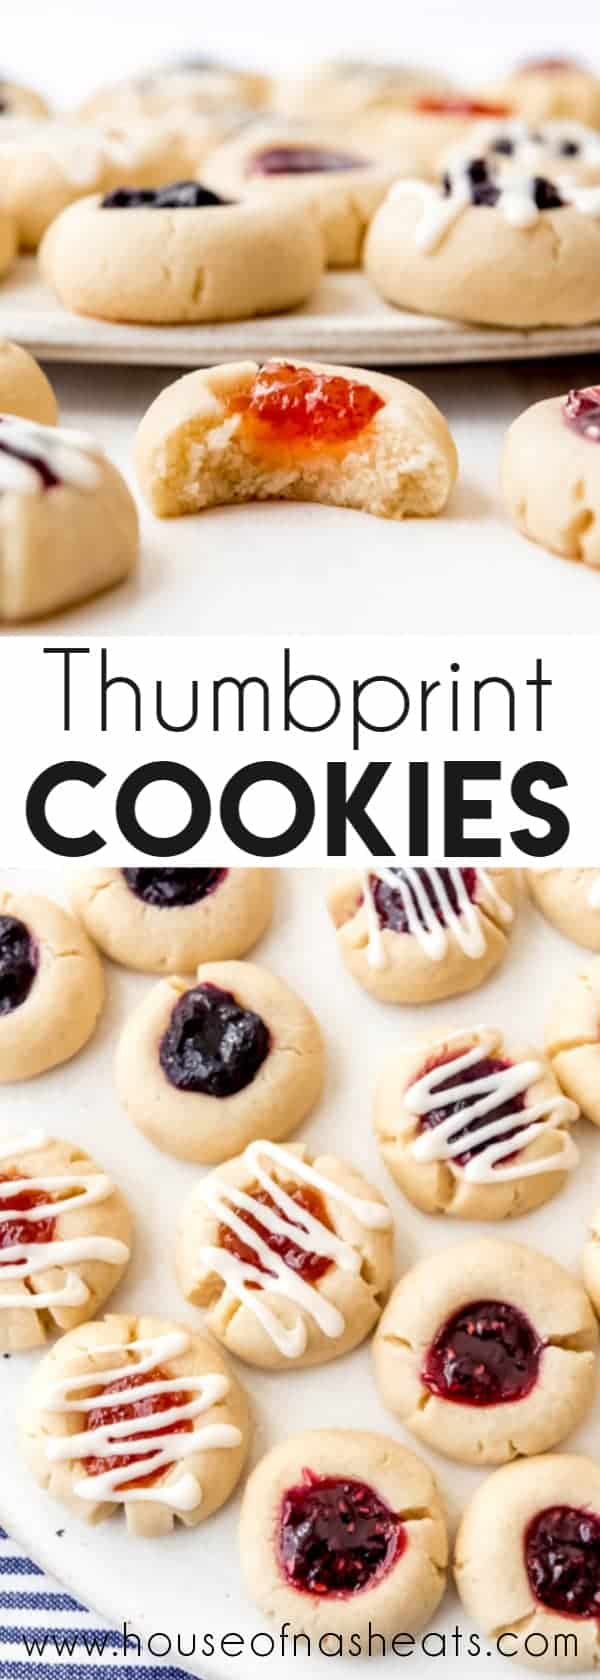
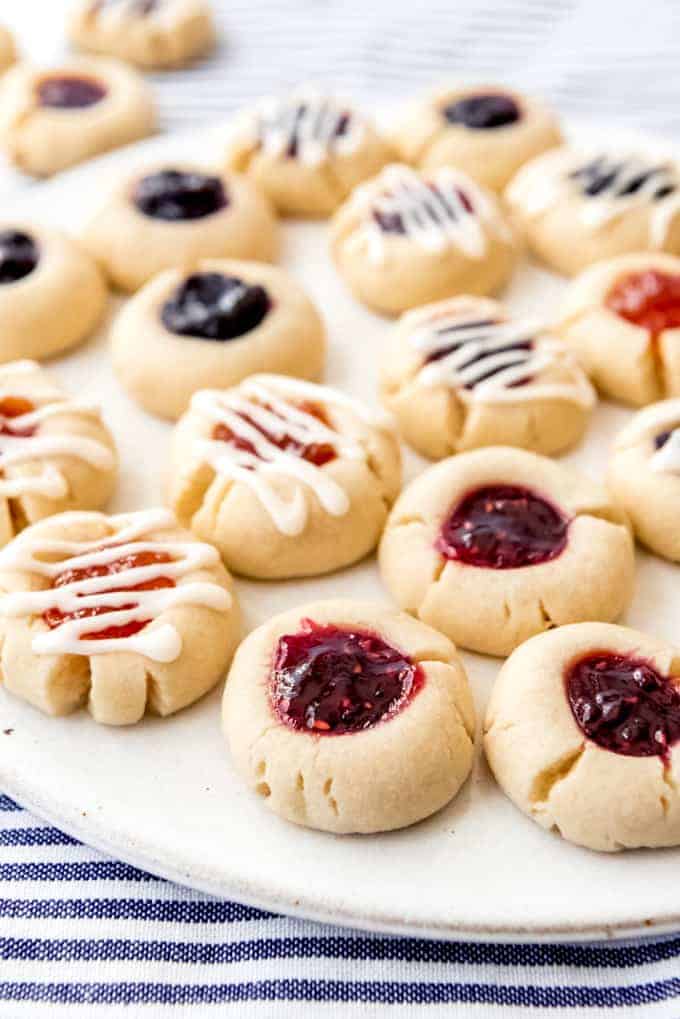
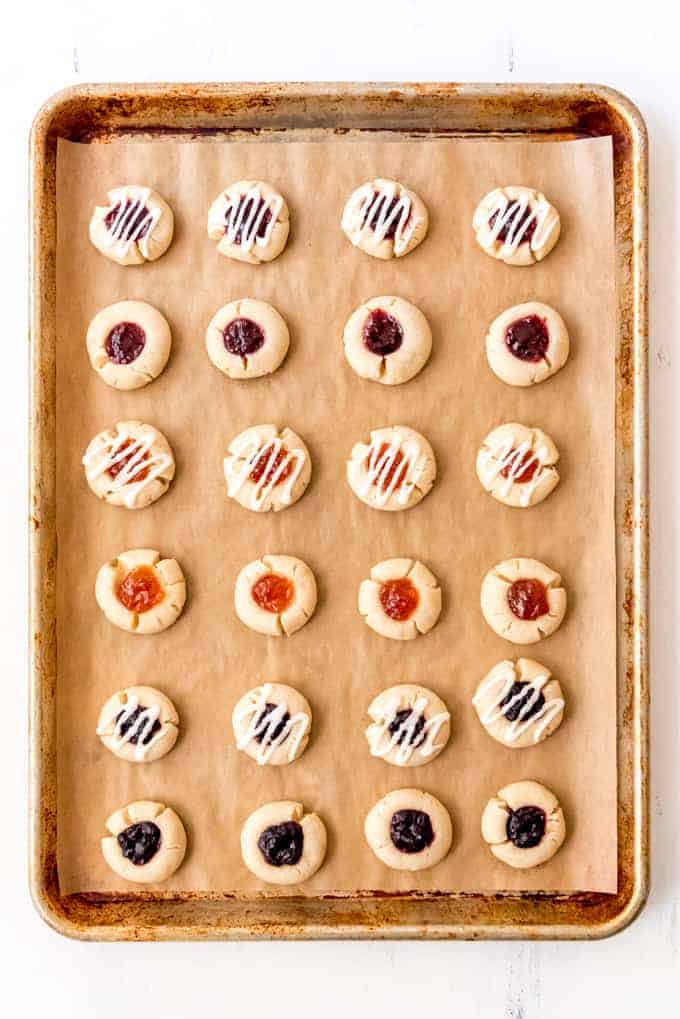
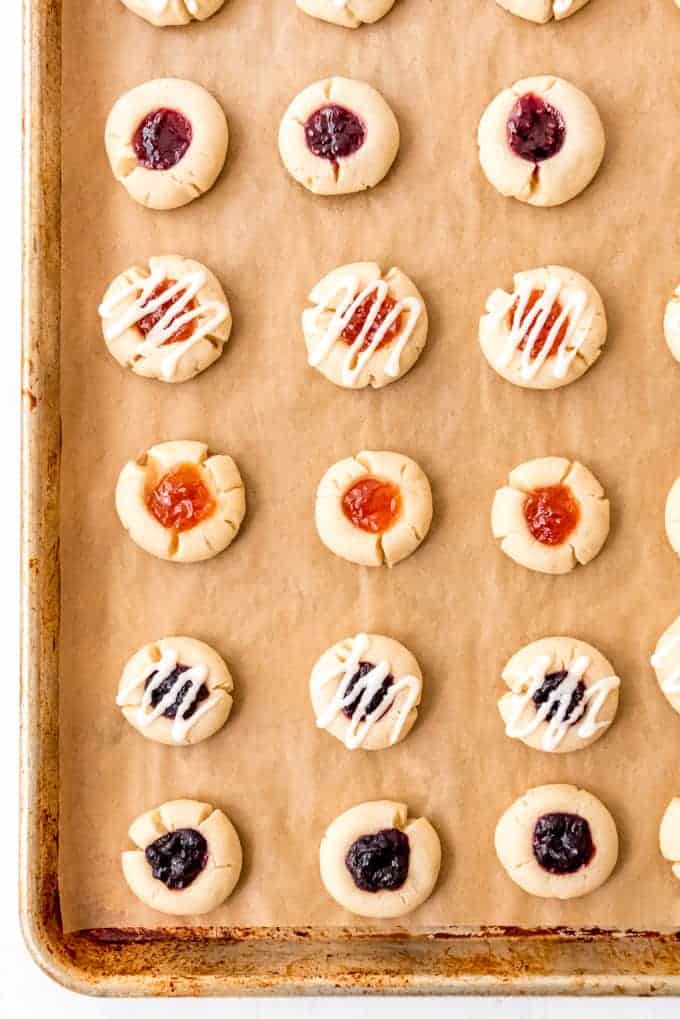
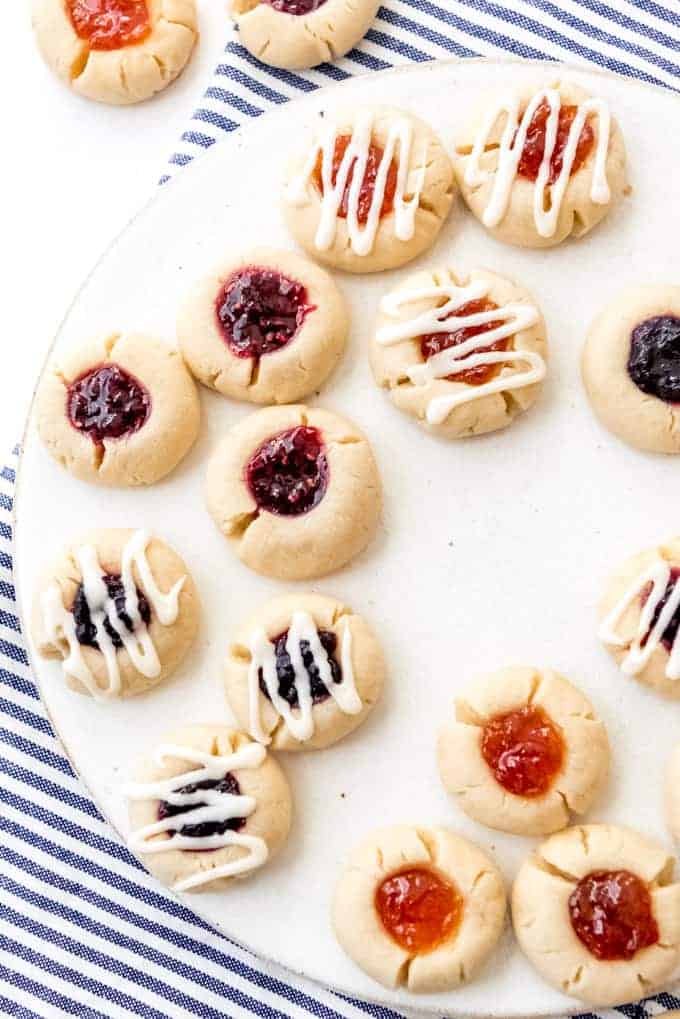
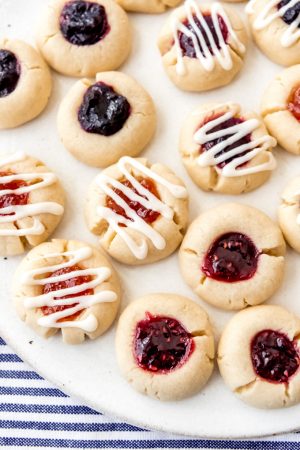
Thumbprint Cookies are a buttery shortbread bite-size delight filled with your favorite jewel-colored jams, then drizzled with a simple vanilla glaze. They make a fun and tasty addition to any holiday cookie plate!
If you are looking to round out your Christmas cookie plates, be sure not to miss my Chocolate Crinkle Cookies , Soft & Chewy Molasses Cookies , and Perfect Peanut Butter Blossoms .
I adore shortbread cookies and look forward to making cranberry shortbread bars and toffee pecan shortbread cookies every year.
It’s the perfect canvas for showcasing other flavors in a crumbly, buttery cookie that practically melts in your mouth.
And it’s not as sweet as most cookies, which is why it goes so well with the fruity jam baked in the center of each little one- or maybe two-bite cookie.
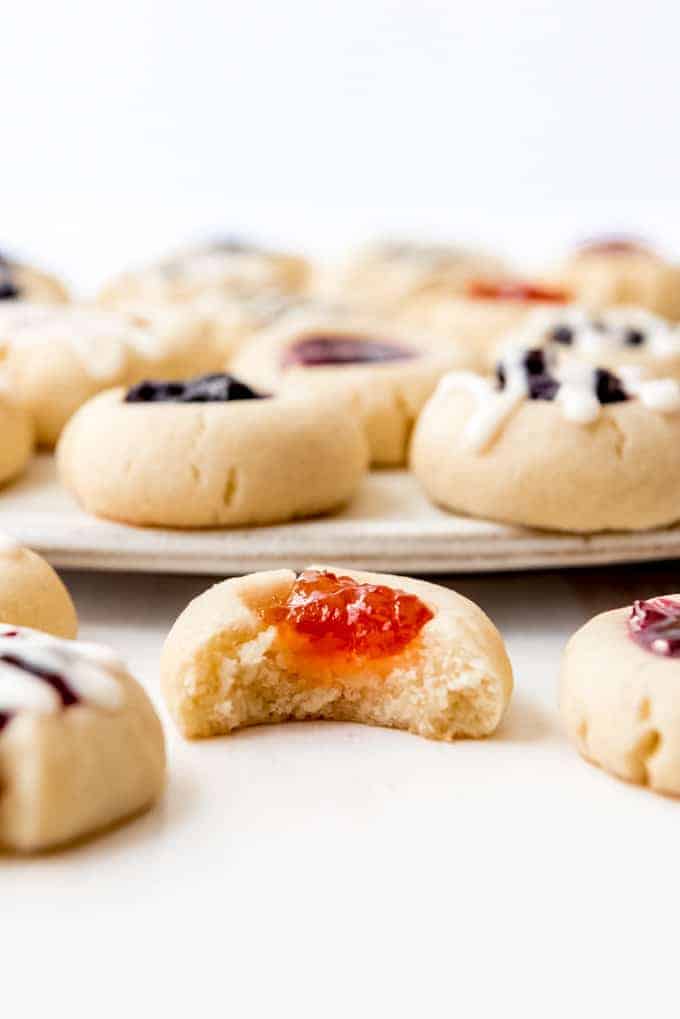
These thumbprint cookies are no exception and one of my favorite traditional Christmas cookies. The easy shortbread dough comes together quickly and little helpers love rolling the dough into balls, then making the thumbprint to hold a dollop of jam.
And speaking of jam, you can use any jam flavor you like! I grabbed raspberry, blueberry, and apricot jam from my fridge for these thumbprint cookies and all were absolutely delicious.
But I just bought a jar of cloudberry jam from Ikea and will try that when I make these again closer to Christmas! And strawberry, boysenberry, and peach jam are also yummy choices.
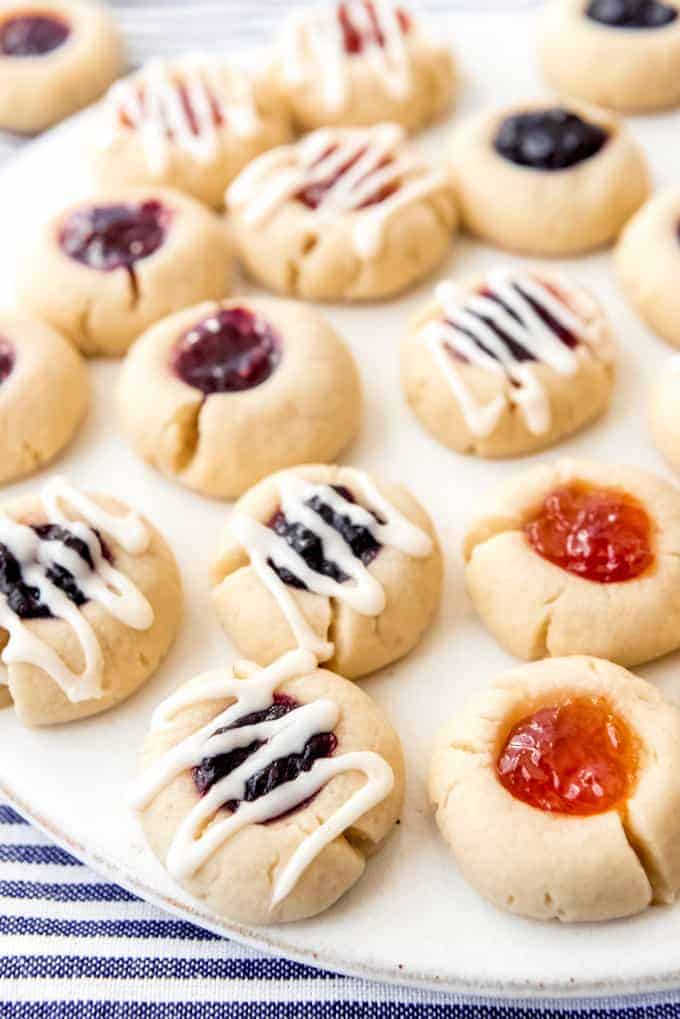
The glaze is optional and thumbprint cookies are good with and without the glaze, but I love the way it dresses up these cookies and makes them just a bit more special.
How to Make Thumbprint Cookies
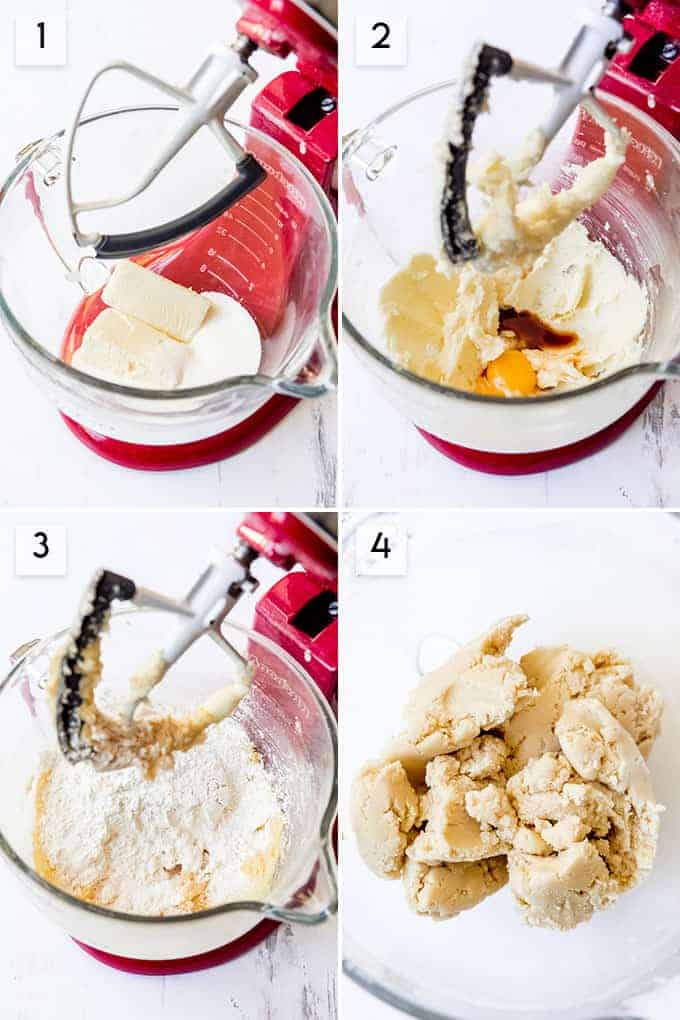
- Mix the butter and sugar together until light and fluffy in a stand mixer.
- Add egg yolk and vanilla, beating until combined and scraping down the sides and bottom of the bowl as needed.
- Add flour, cornstarch, and salt. At first it might seem like the dough isn’t going to come together because there isn’t much liquid for binding, but if you keep mixing it will form a nice dough that is perfect for shaping into balls.
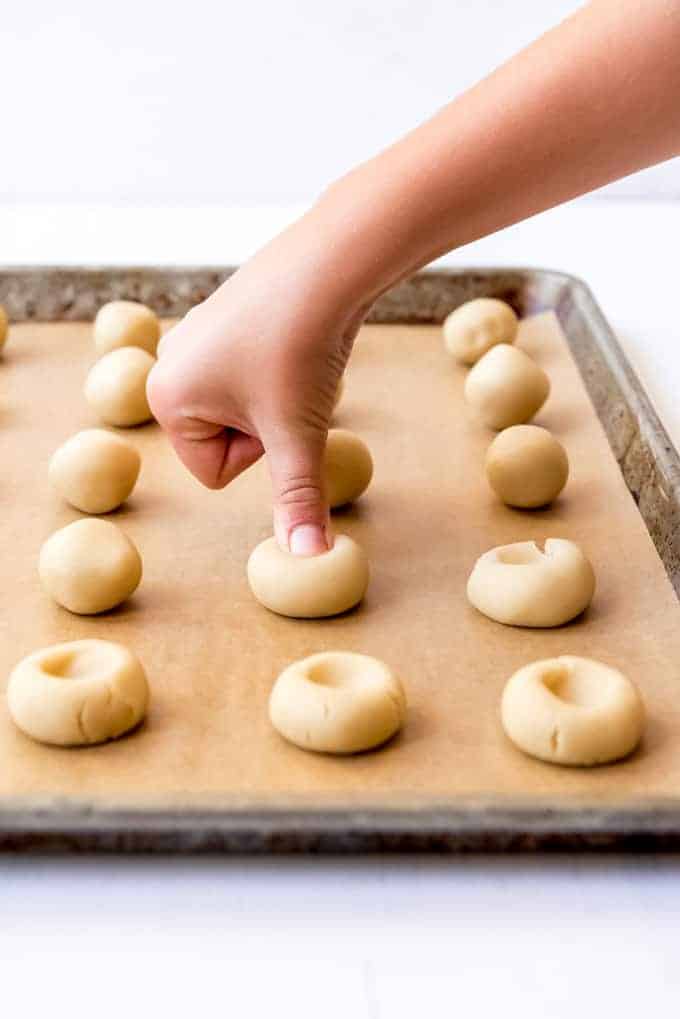
- Scoop out small amounts of dough and roll into 1 tablespoon size balls, then place on a parchment-lined baking sheet.
- Use your thumb or the back of a ½ teaspoon measuring spoon to make an indentation in the center of each cookie. Some people get hung up on thumbprint cookies with no cracks, but I find that’s pretty hard to avoid. You can press the dough back together a bit before filling with jam and baking, but I actually think it adds charm and a homemade quality to the cookies that I like.
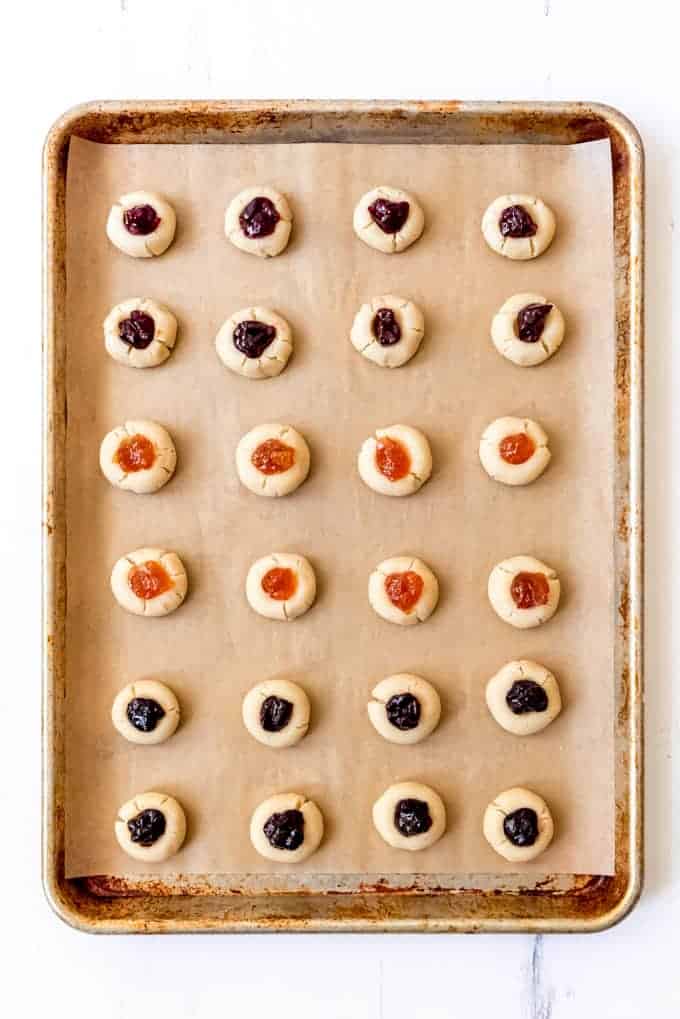
- Fill with about ½ teaspoon of jam. If the jam is thick, you may need to warm it just a bit in the microwave until you can stir in, but you don’t want to get it too hot.
- Bake until barely browned around the bottom edges of the cookies, but definitely don’t overbake. 9-11 minutes in a 375°F oven is perfect for me.

Do I need to chill the dough?
I have found that this dough is easy to work with right after mixing without chilling it in the fridge first.
You should be able to roll the balls of dough between the palms of your hands without any difficulty, even with unchilled dough. Because the cookies are small and have little liquid in them, they don’t spread much while baking, so chilling is unnecessary.
How to Store Thumbprint Cookies
Jam thumbprint cookies can be stored in an airtight container on the counter at room temperature or in the refrigerator for up to 1 week.
For longer storage, you can freeze the cookies for up to 3 months. Just let them thaw on the counter for 30-60 minutes before eating.
More Christmas Cookies You’ll Love
- Mexican Wedding Cookies [aka Russian Tea Cakes]
- Homemade Iced Oatmeal Cookies
- The Best Snickerdoodle Cookies Recipe
- Oatmeal Rolled Sugar Cookies
- Best Cut-Out Sugar Cookies
- Toffee Pecan Shortbread Cookies
- Peppermint Macarons
- Chocolate-Dipped Almond Biscotti
- Greek Baklava Recipe
- Double Chocolate Nutella Sandwich Cookies
- Soft & Chewy Gingerbread Men Cookies
Did you make this recipe?
Let me know what you thought with a comment and rating below. You can also take a picture and tag me on Instagram @houseofnasheats or share it on the Pinterest pin so I can see.
Jam Thumbprint Cookies
Ingredients123
Cookies
- ▢ 1 cup salted butter softened
- ▢ 2/3 cup granulated sugar
- ▢ 1 large egg yolk
- ▢ 2 teaspoons vanilla
- ▢ 2 1/4 cup all-purpose flour
- ▢ 2 teaspoons cornstarch
- ▢ 1/2 teaspoon salt
- ▢ 1/2 cup jam or preserves raspberry and apricot are our favorites but you can use any you like
Glaze
- ▢ 1 cup powdered sugar
- ▢ 1-2 Tablespoons heavy cream or milk
- ▢ 1 teaspoon vanilla extract
Instructions
- Preheat oven to 375°F. Line a baking sheet with parchment paper.
- In a large bowl of a stand mixer, combine the butter and sugar and mix on medium-high speed using the paddle attachment for 2-3 minutes until light and fluffy. 1 cup salted butter, 2/3 cup granulated sugar
- Mix in the egg yolk and vanilla, scraping down the sides and bottom of the bowl as needed. 1 large egg yolk, 2 teaspoons vanilla
- Add the flour, cornstarch, and salt and mix again until everything comes together in a nice dough. It may seem crumbly at first, but just scrape the bottom and sides of the bowl and keep mixing until the dough comes together. 2 ¼ cup all-purpose flour, 2 teaspoons cornstarch, ½ teaspoon salt
- Shape the dough into 1-tablespoon size balls and arrange 2 inches apart on the prepared baking sheet. Gently press in the center of each cookie with your thumb or the back of a ½ teaspoon measuring spoon to create and indentation. Fill with your favorite jam, warming the jam first for about 10 seconds so it is stirrable. ½ cup jam or preserves
- Bake for 9-11 minutes until set and just barely starting to turn golden around the bottom edges. Remove from the oven and cool for 10 minutes.
- While the cookies cool, prepare the glaze by whisking together the powdered sugar, cream or milk, and vanilla in a medium bowl. Transfer to a ziplock bag and snip off one corner. Drizzle the glaze over cookies, then let set for 1-2 hours until the glaze has set up. 1 cup powdered sugar, 1-2 Tablespoons heavy cream or milk, 1 teaspoon vanilla extract
Notes
- These cookies can be stored in an airtight container at room temperature or in the fridge for up to 1 week, or frozen for up to 3 months.
Nutrition

Small Batch Blackberry Plum Jam
Ingredients
- 2 cups fresh blackberries
- 2 pounds fresh ripe plums (any variety)
- 3 cups granulated sugar
- 2 Tablespoons fruit pectin
- Juice of 1 lemon
- 1 Tablespoons salted butter
Instructions
- Wash four 8-ounce jars in the dishwasher to sterilize them. Set aside.
- Wash and drain blackberries. Wash plums and slice them in half, removing the stone.
- Add the blackberries, plums, sugar, pectin, lemon juice, and butter in a medium saucepan over medium-high heat. Bring to a boil for 3 minutes.
- Reduce heat to medium-low and simmer for about 30 minutes or until a digital thermometer reads 220°F. Stir regularly to prevent the jam from scorching.
- Remove from the heat and allow to come to room temperature.
- Fill each jar, leaving 1/4-inch space at the top of each jar. Gently tap the jars on the counter to remove any air bubbles.
- Wipe the tops of the jars clean, then twist on the lids and store in the refrigerator for up to 3 weeks, in the freezer for up to 1 year, or preserve using the water-bath method, which will let them keep for 18 months in the pantry.
Notes
Storage & Make Ahead
- Store: Keep your opened jam jars in the fridge for up to 3 weeks. Just make sure the lids are tightly sealed!
- Freeze: Want to save some for later? Pour your jam into freezer-safe containers, leaving space at the top. It will keep well in the freezer for up to a year.
- Reheat: To enjoy it warm, microwave a spoonful of jam for a few seconds or let the jar sit at room temperature for a bit.
- Make Ahead: This jam is perfect for making ahead! Prepare a big batch and store it using the water bath method, so you can enjoy your jam for up to 18 months.
QR code
Scan this QR code with your phone’s camera to view this recipe on your mobile device.
